

Steps to set Okta as an OIDC identity provider
1
Navigate to the Applications view within your Okta Administrator Dashboard.
2
Click on Create App Integration.
3
A dialog appears, select OIDC - OpenID Connect as the sign-in method.
4
For the application type, select Web Application and click on Next.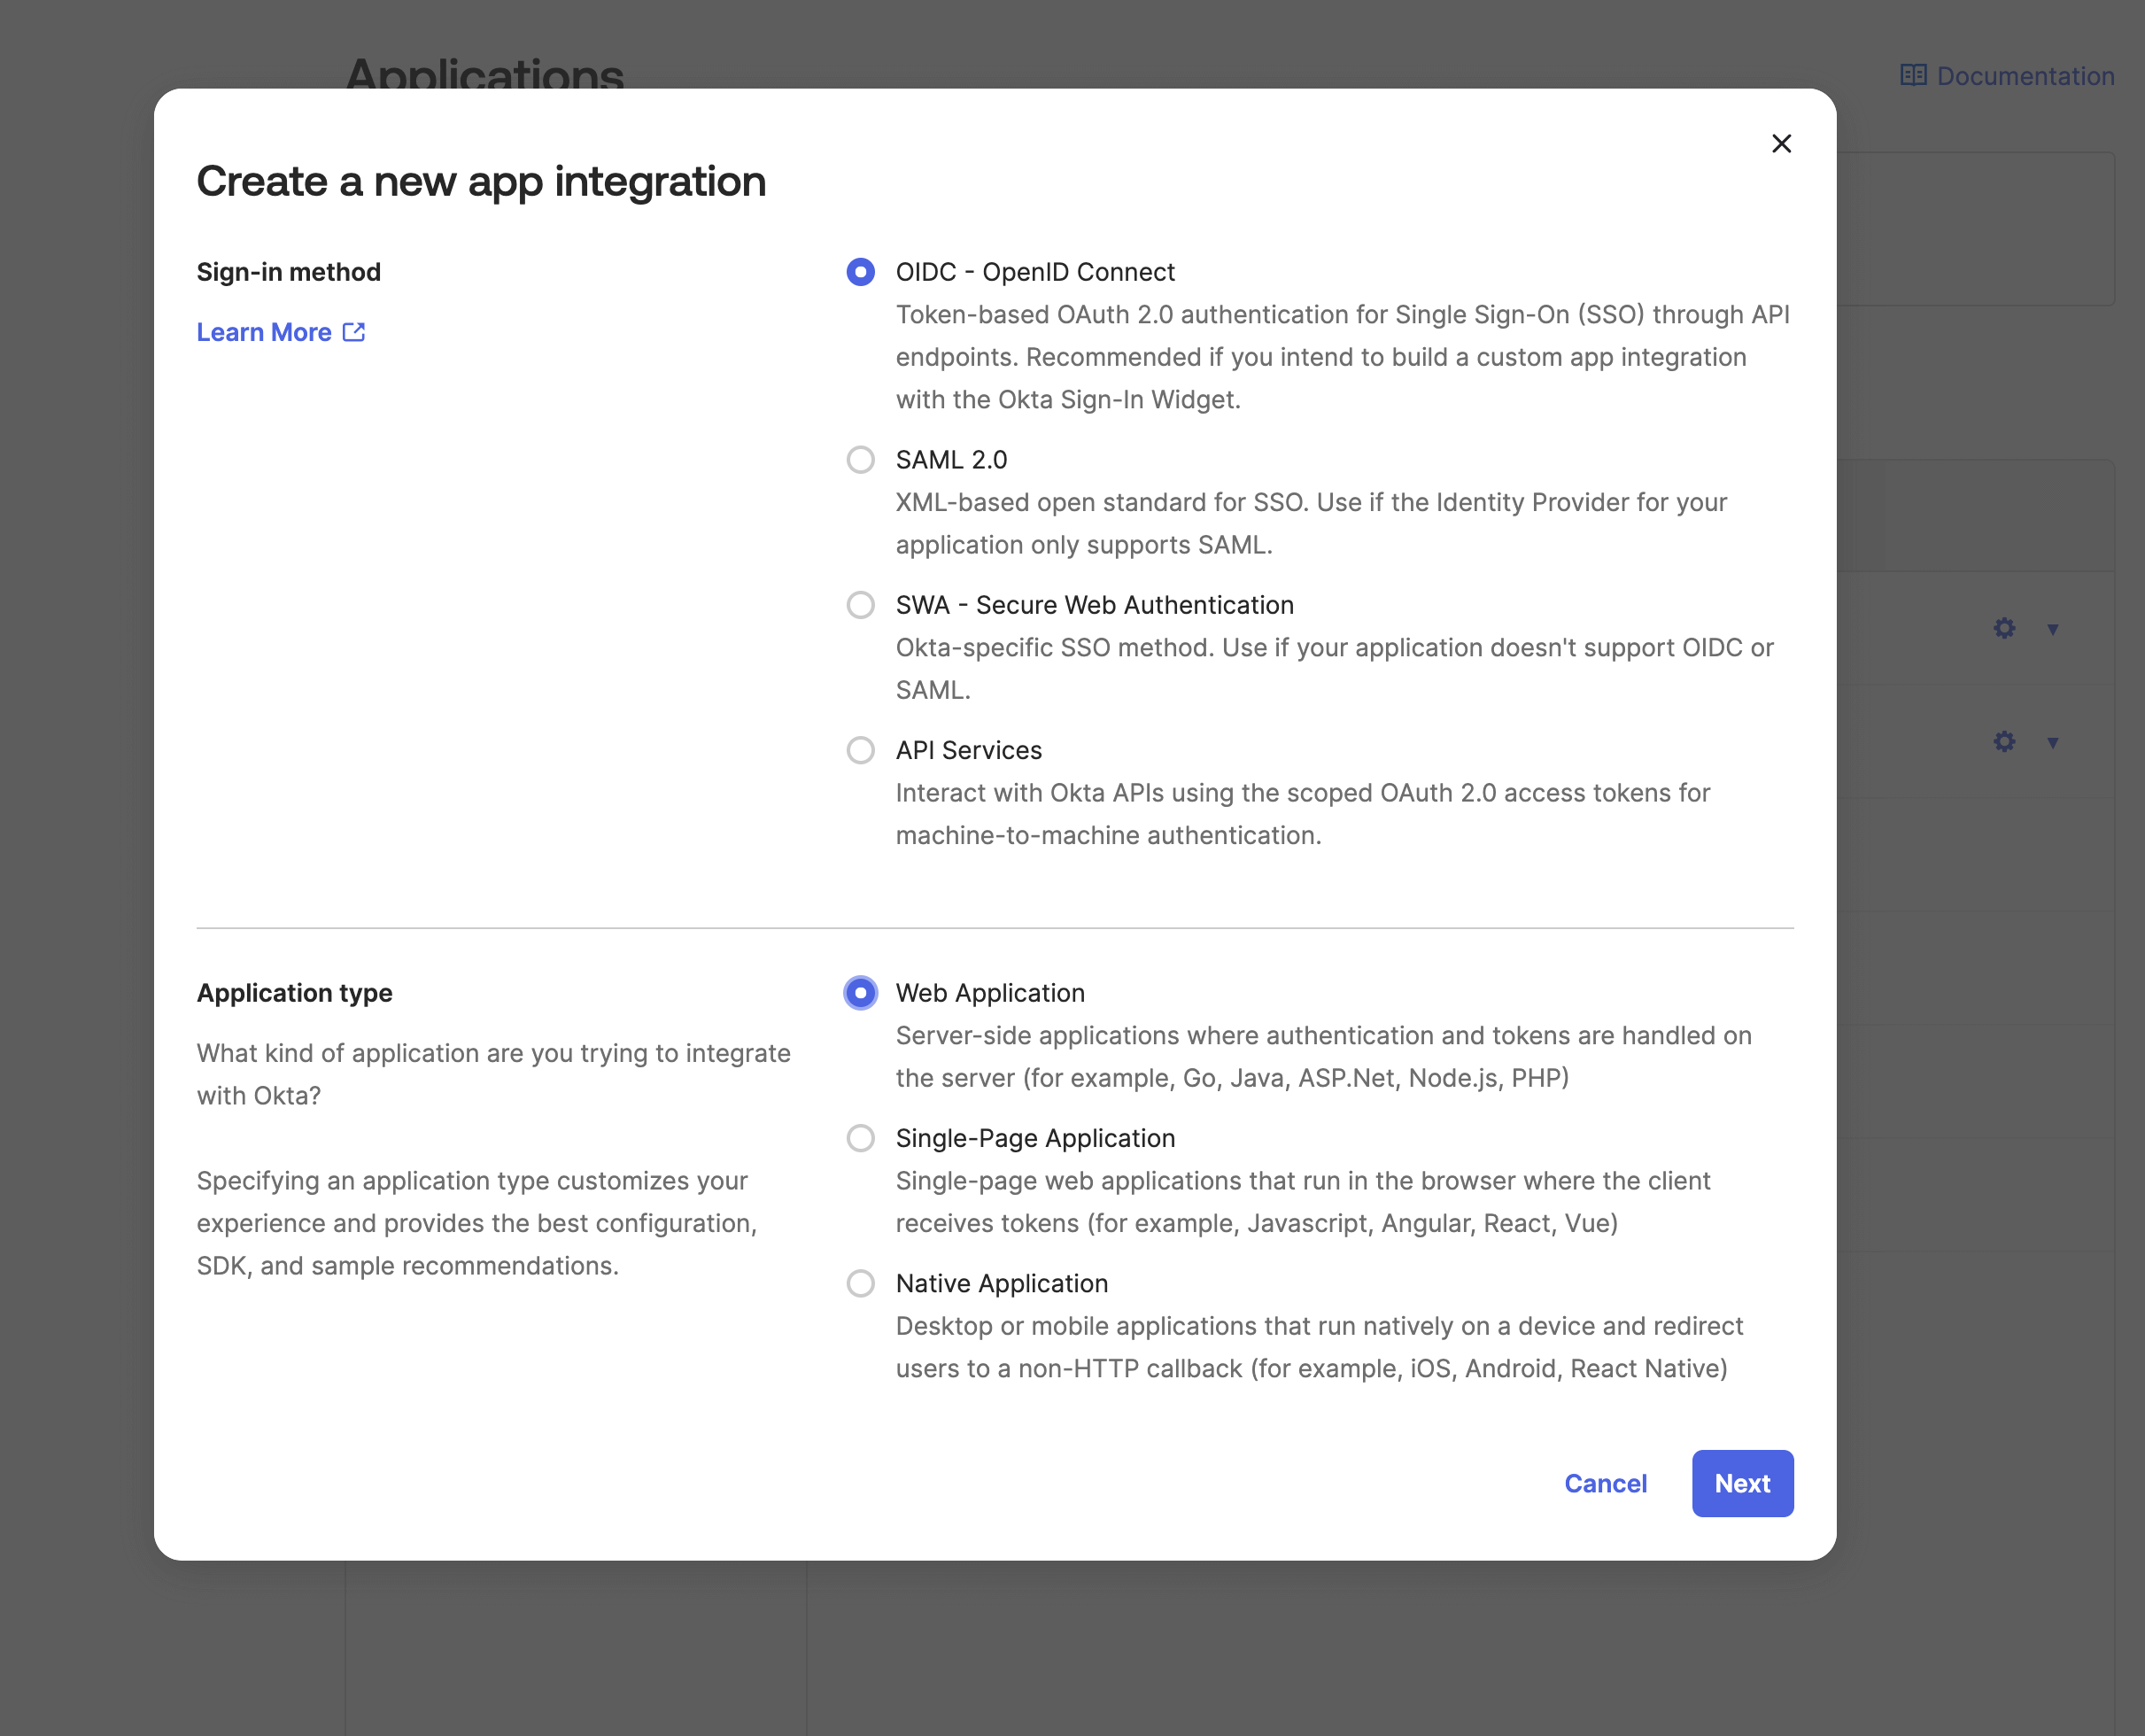
5
Now give the app a name.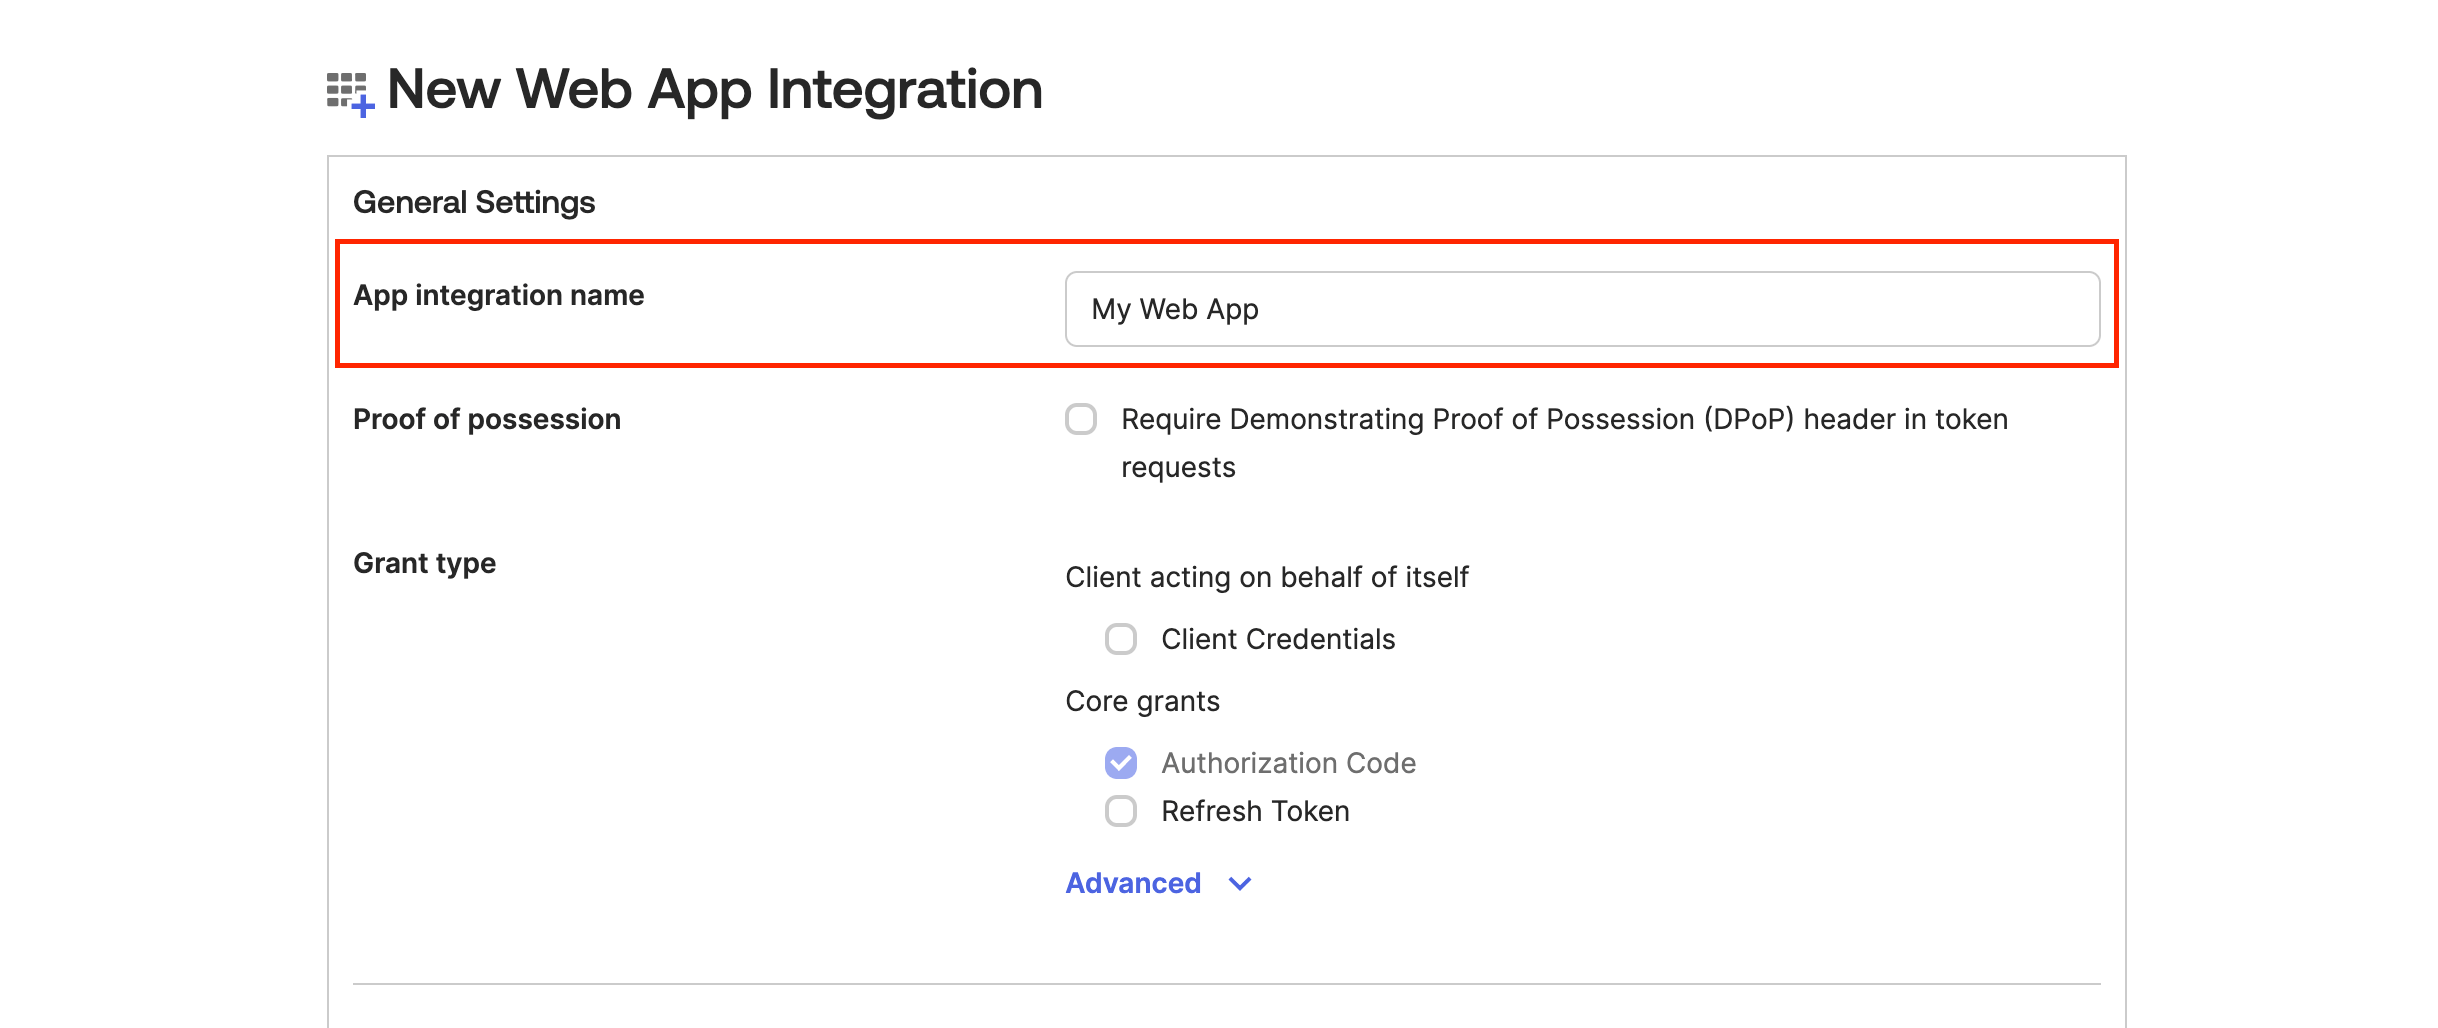
6
For Grant Type, keep the defaults.
7
Scroll down to the Assignments section and select one of the options based on your choice and then click on Save.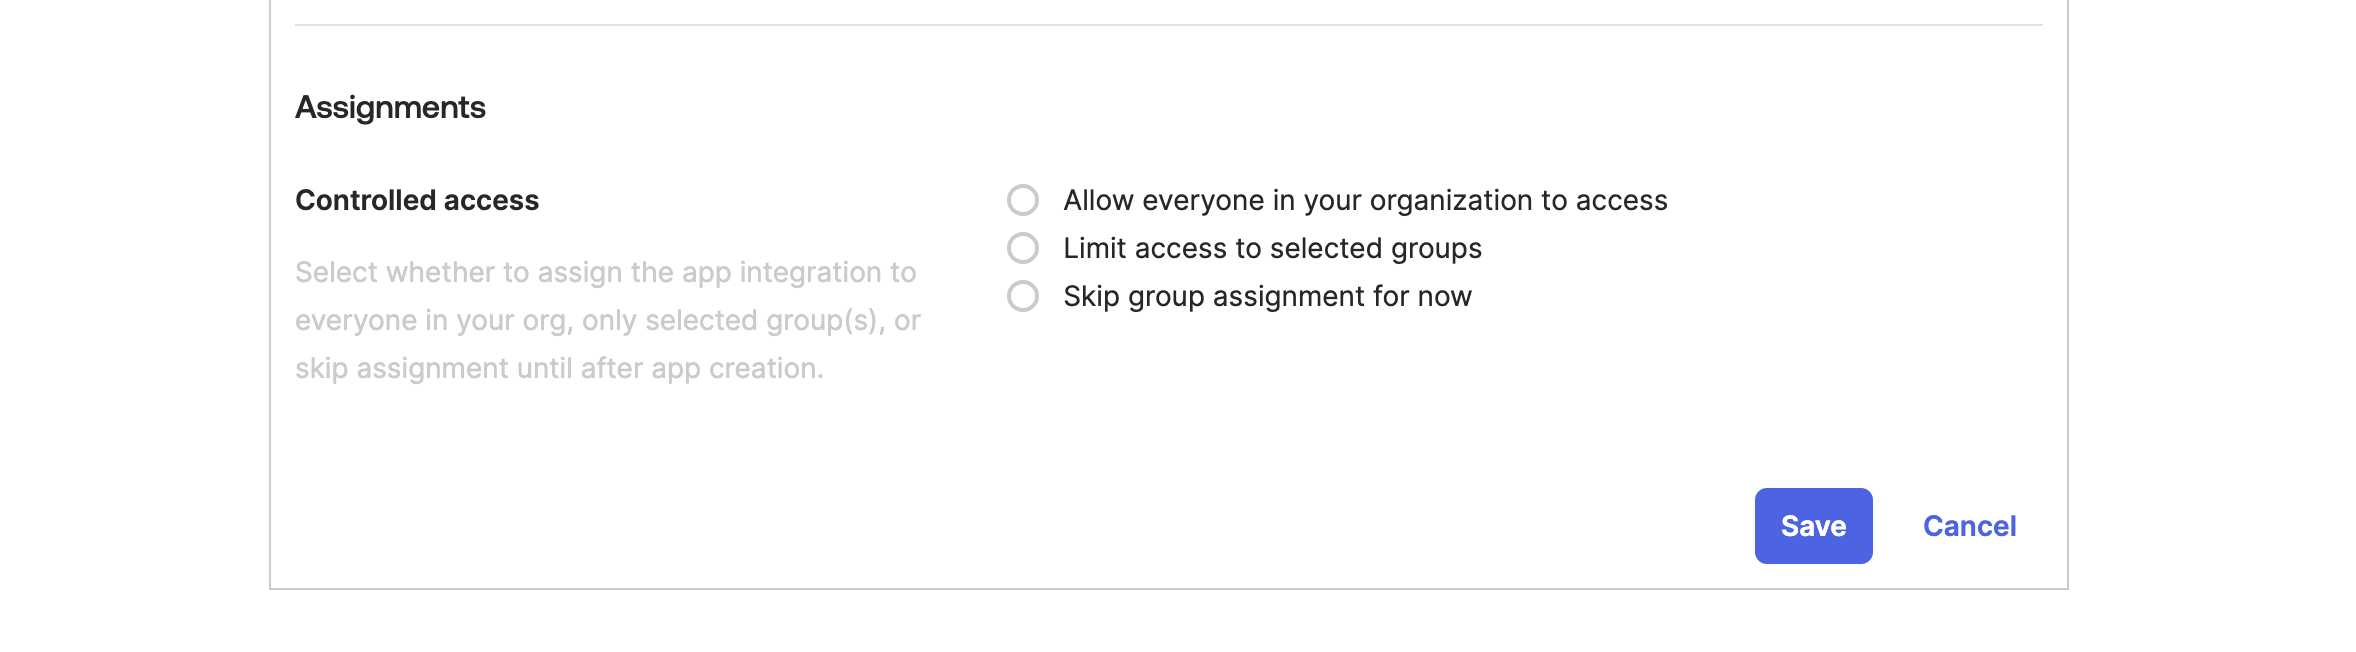
8
Copy the Client ID and Client Secret.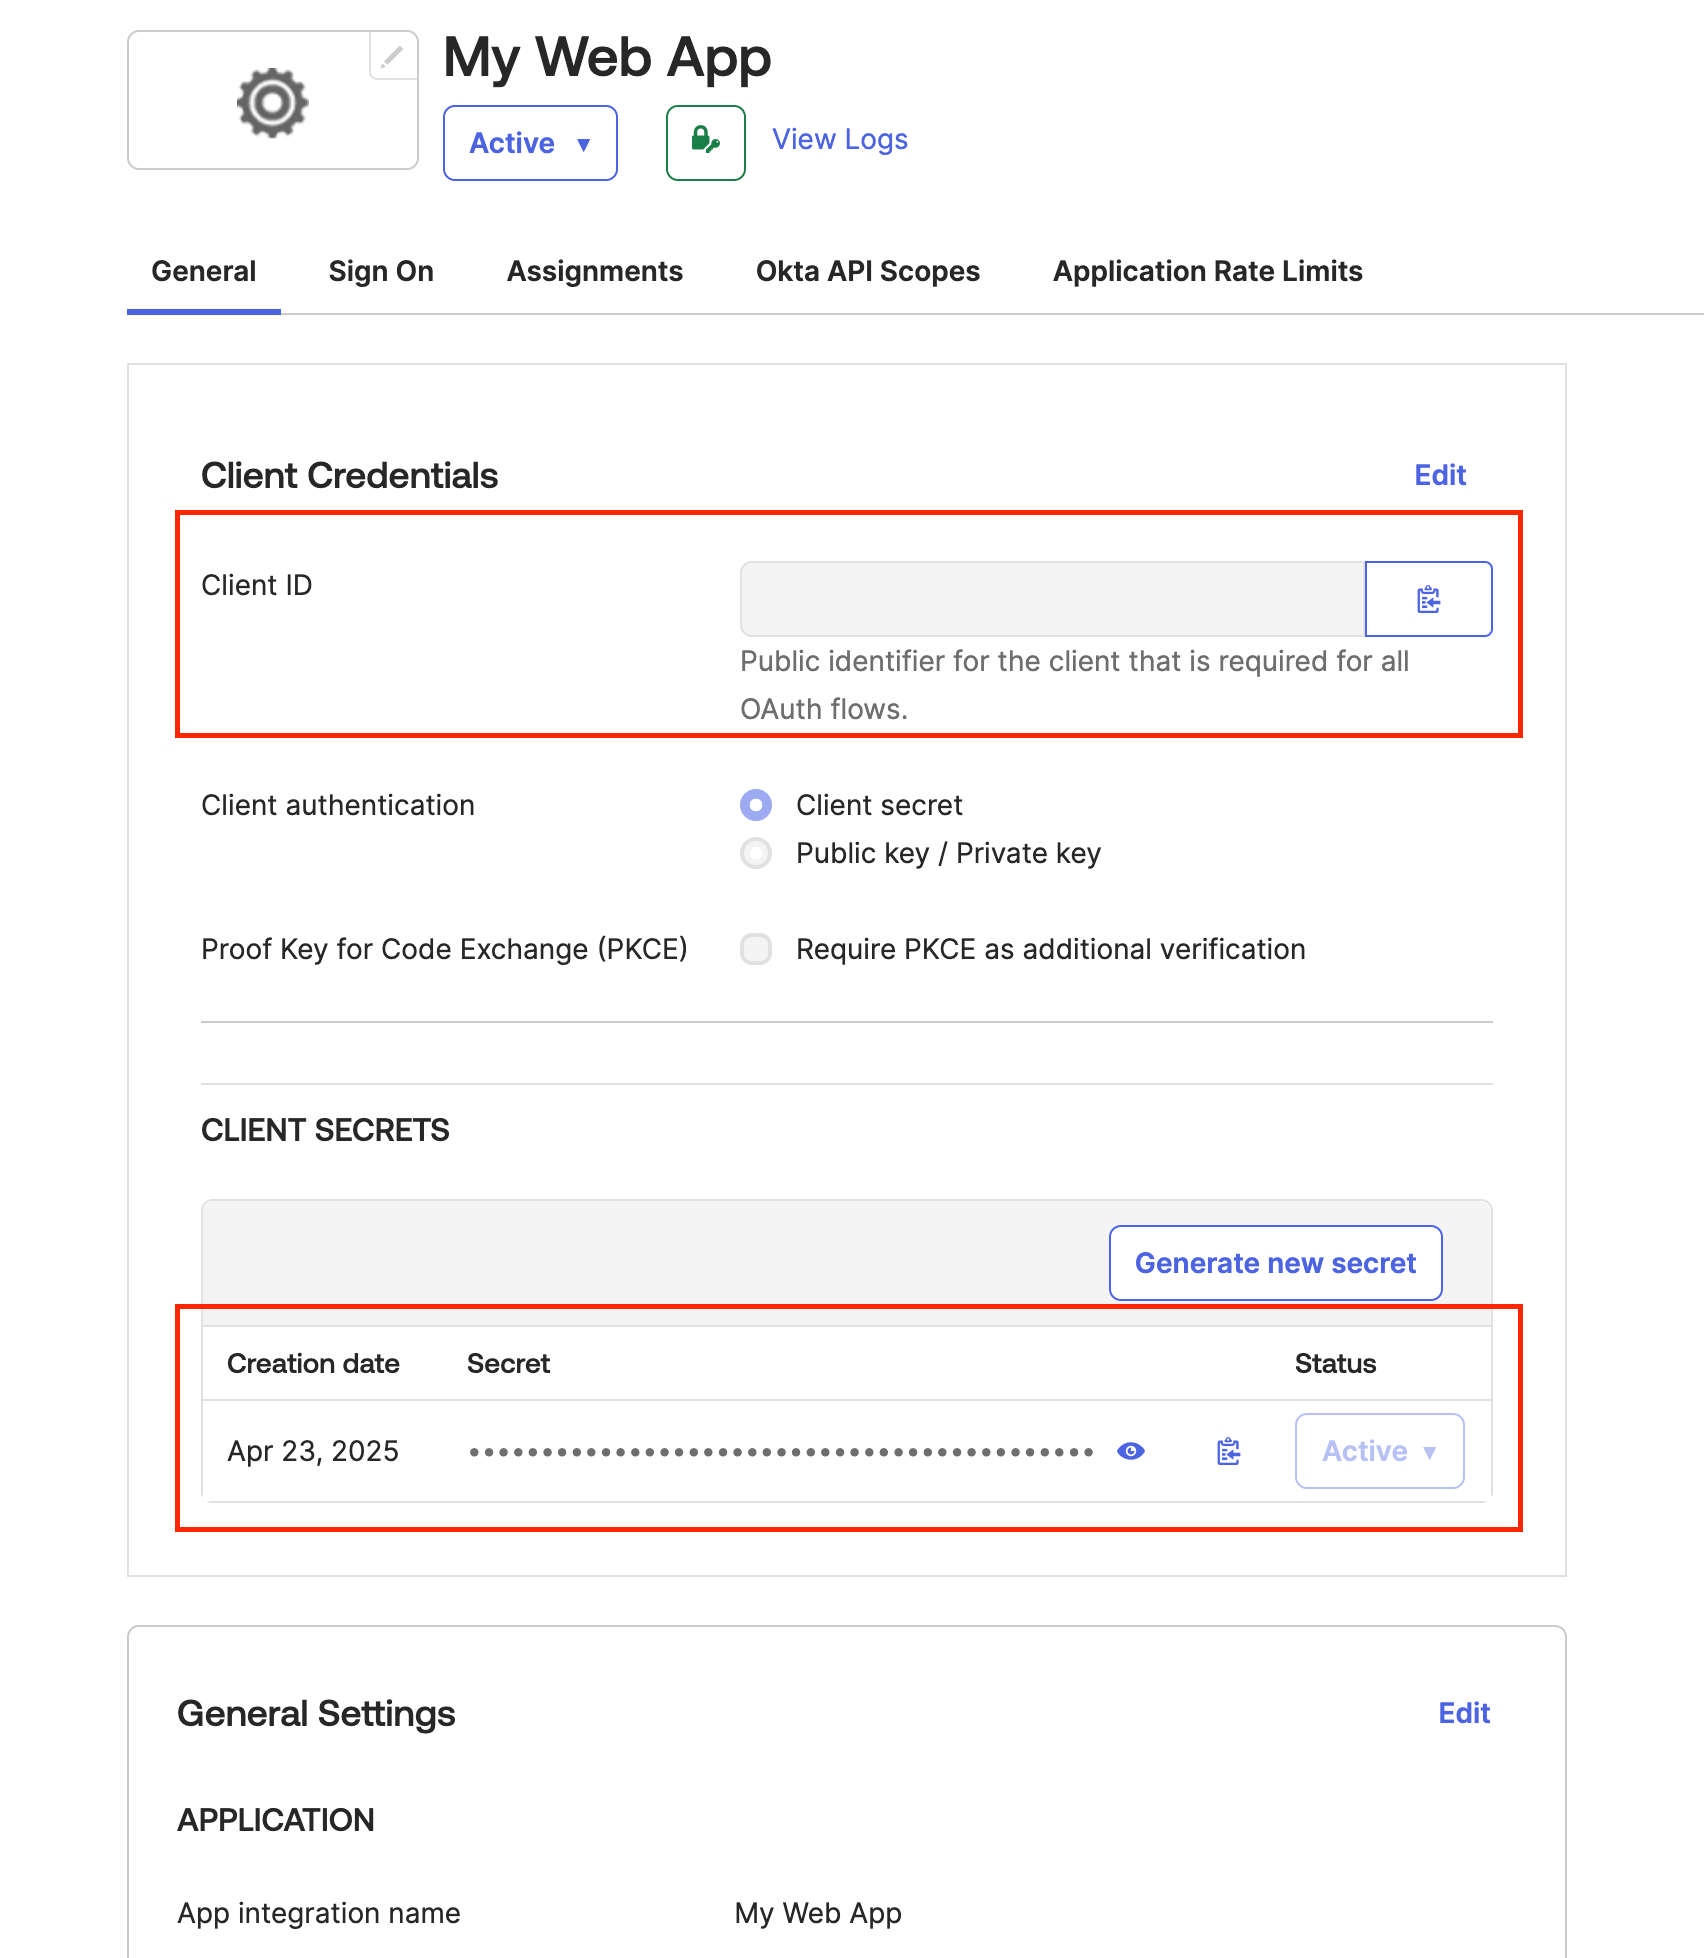
9
Navigate to Security -> API.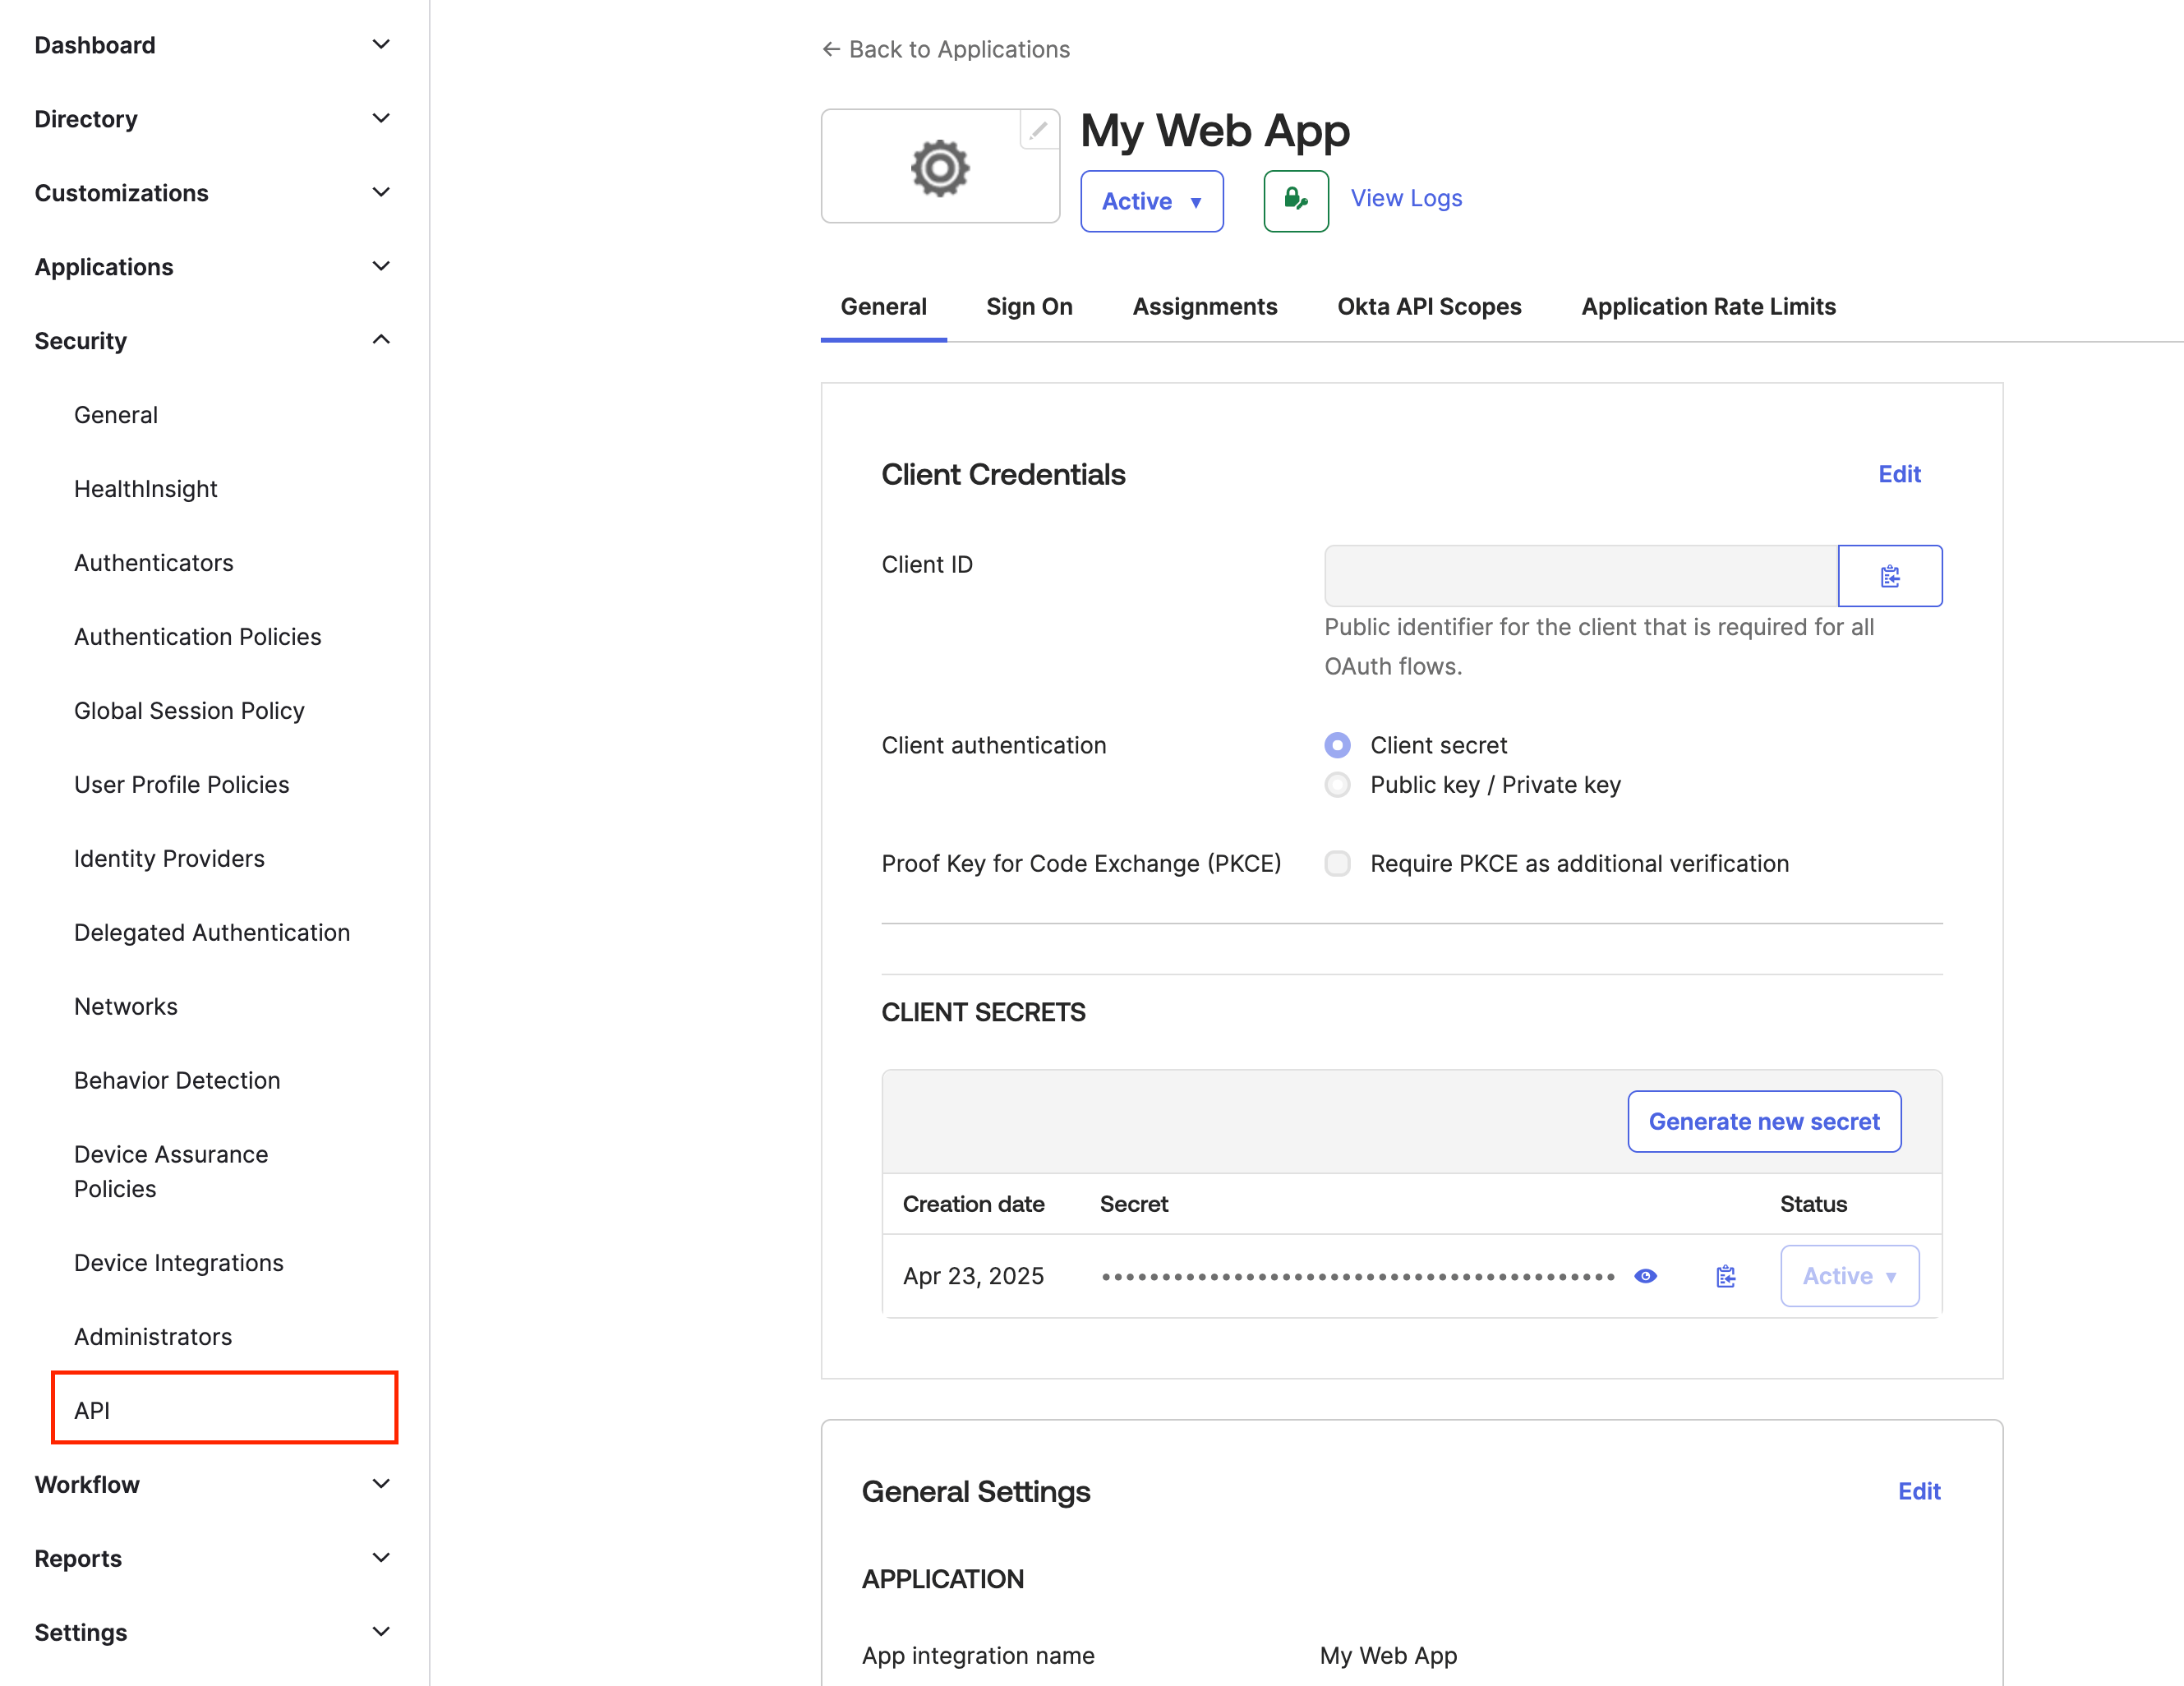
10
Select the default authorization server.
11
Copy the Metadata URI.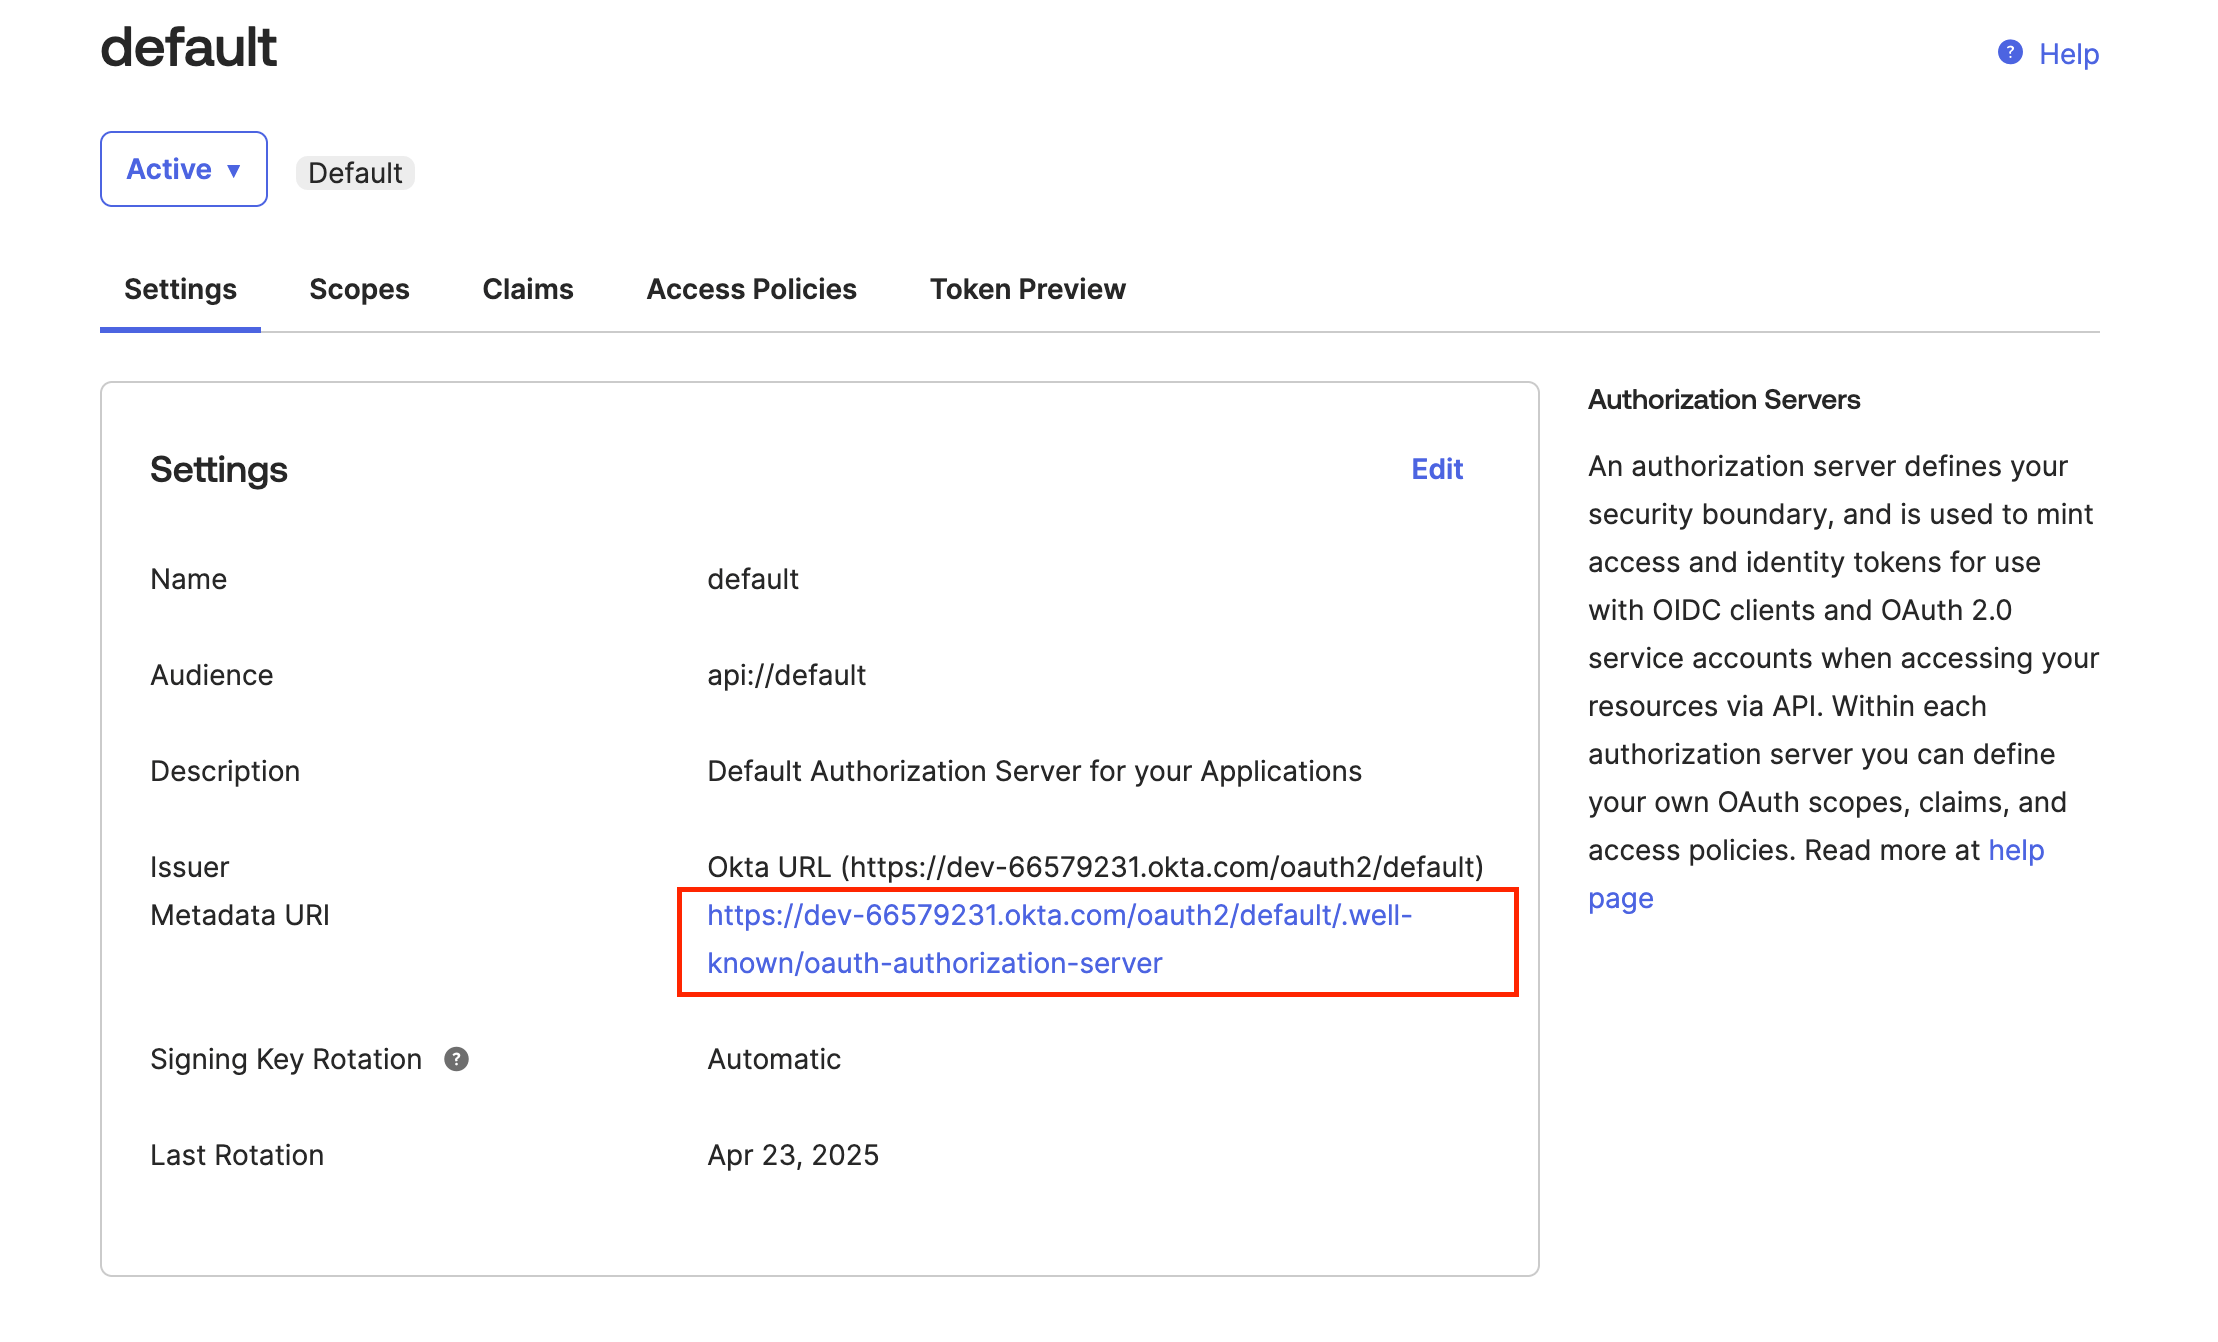
12
Navigate to the settings page on Cosmo.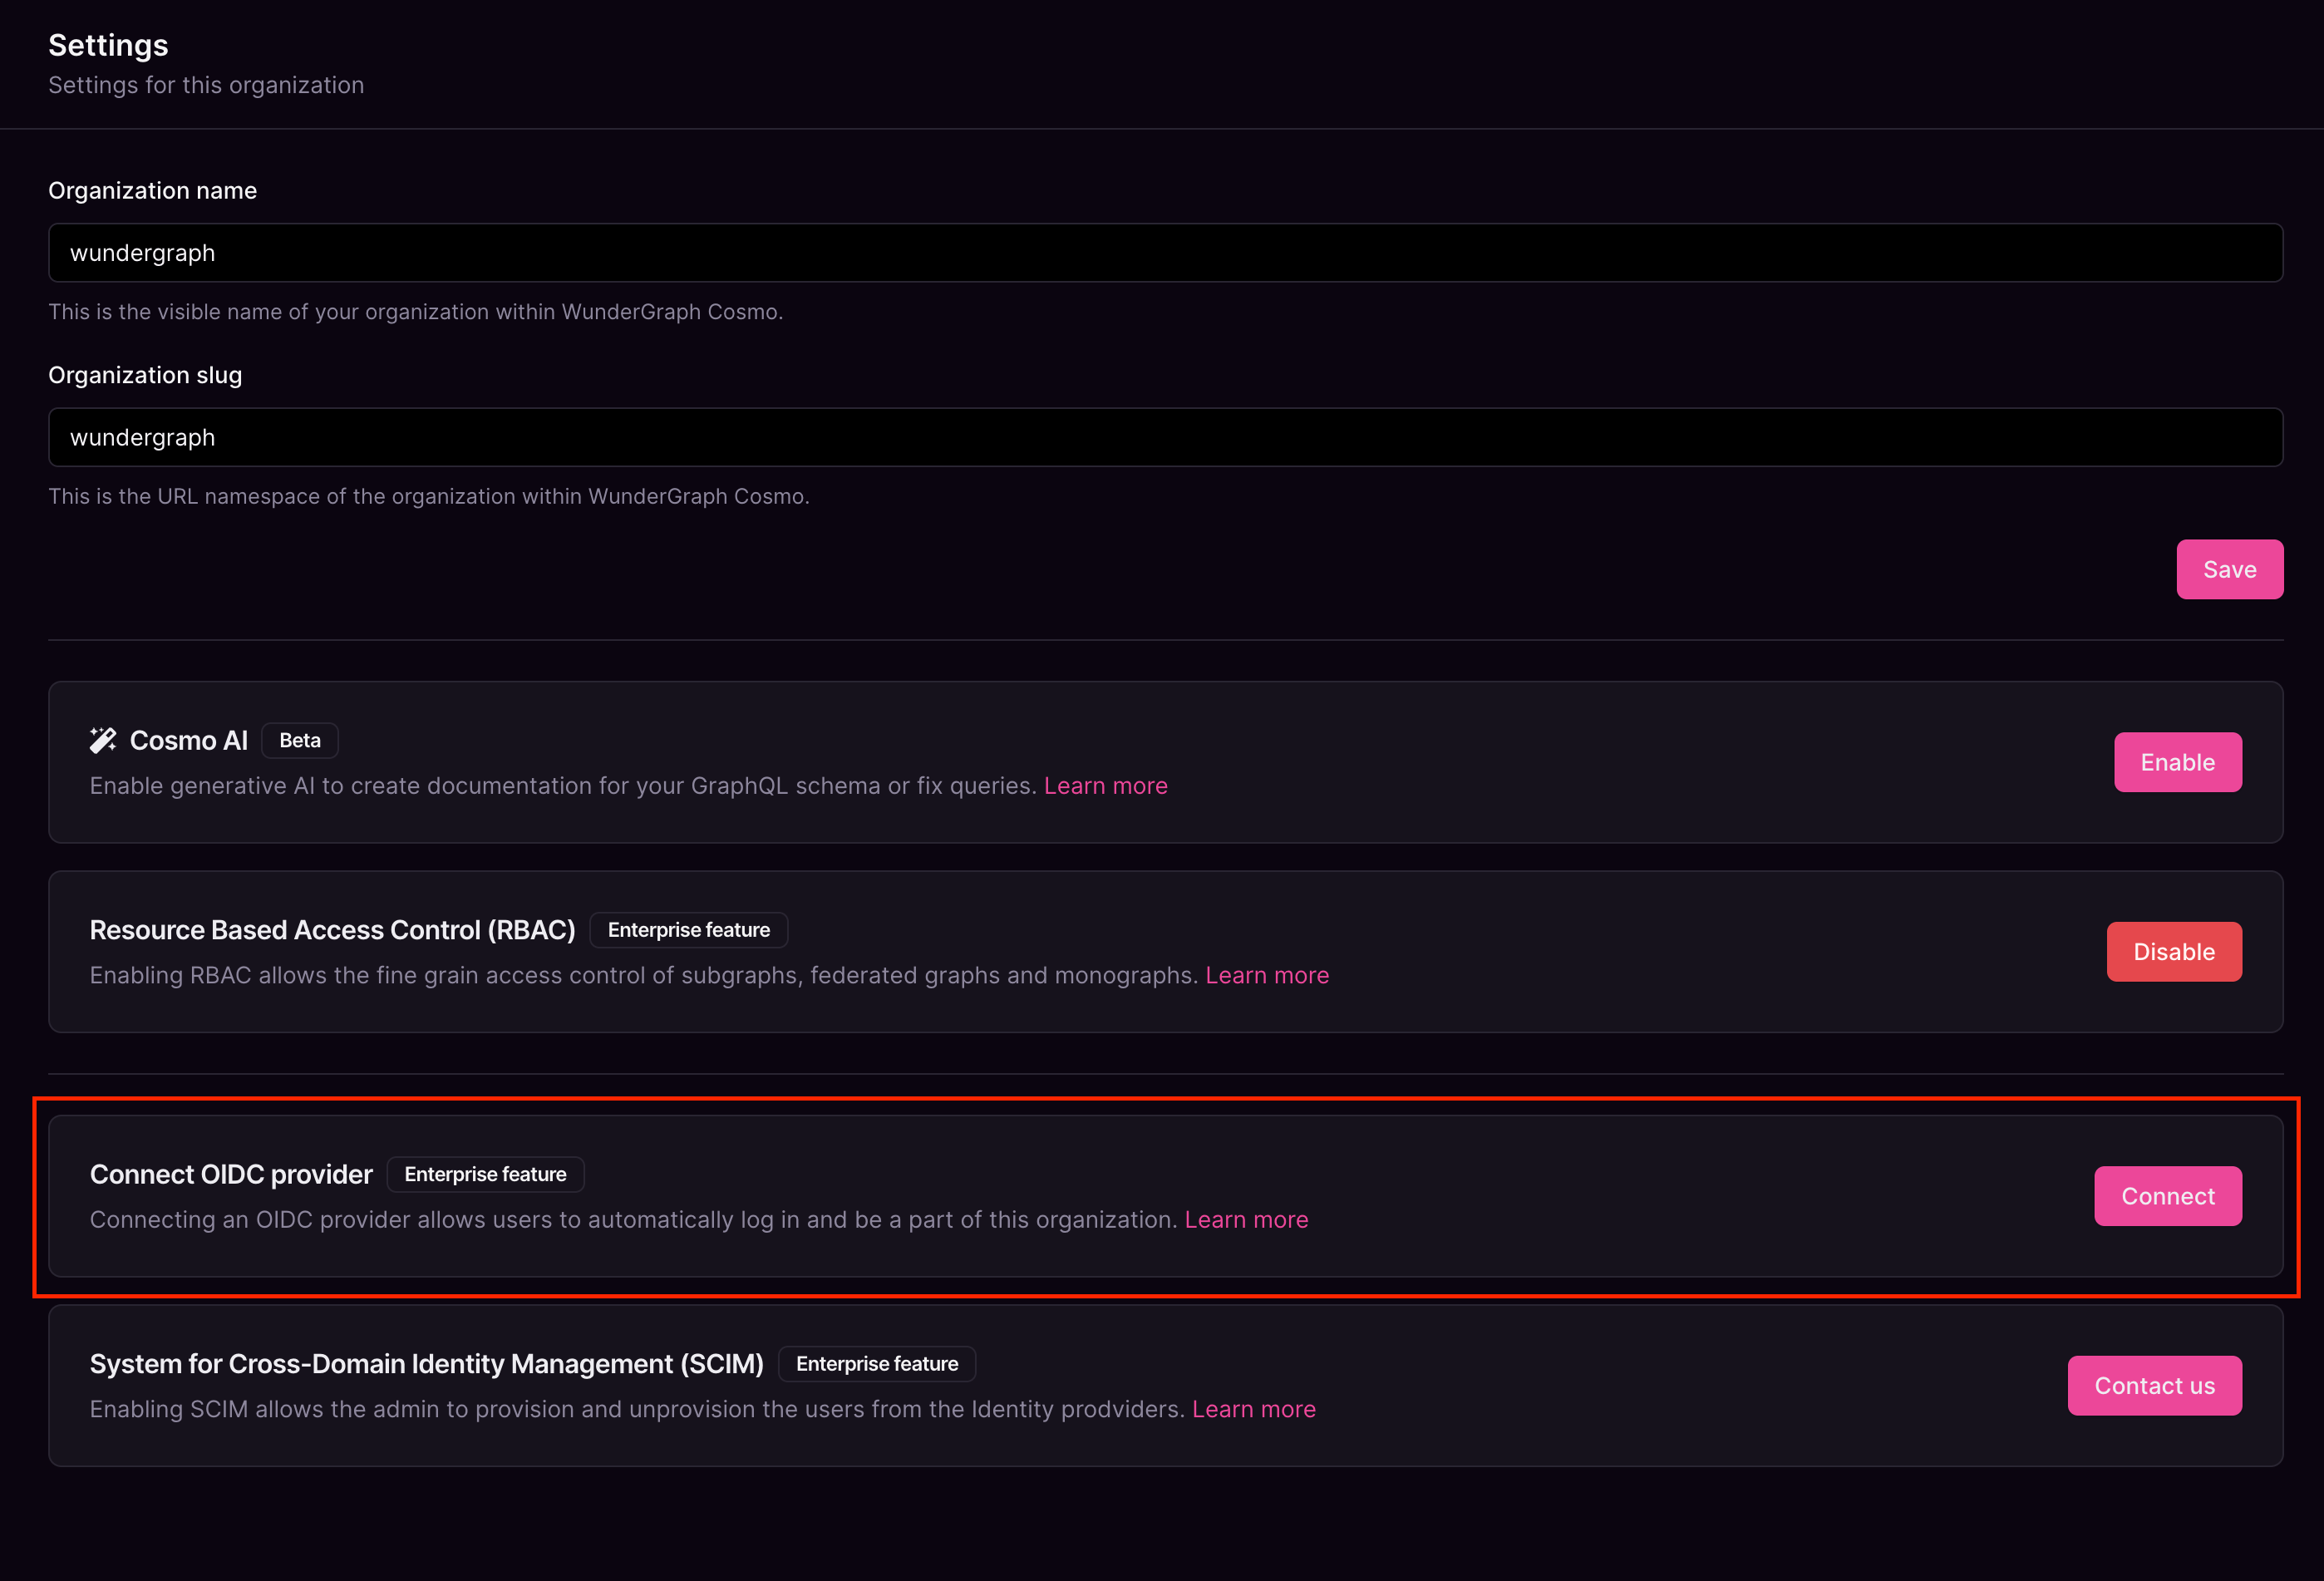
13
Give the connection a name, paste the Metadata URI copied before, into the Discovery Endpoint,and paste the Client ID and Client secret copied before into the Client ID and Client Secret fields respectively,and then click on Connect.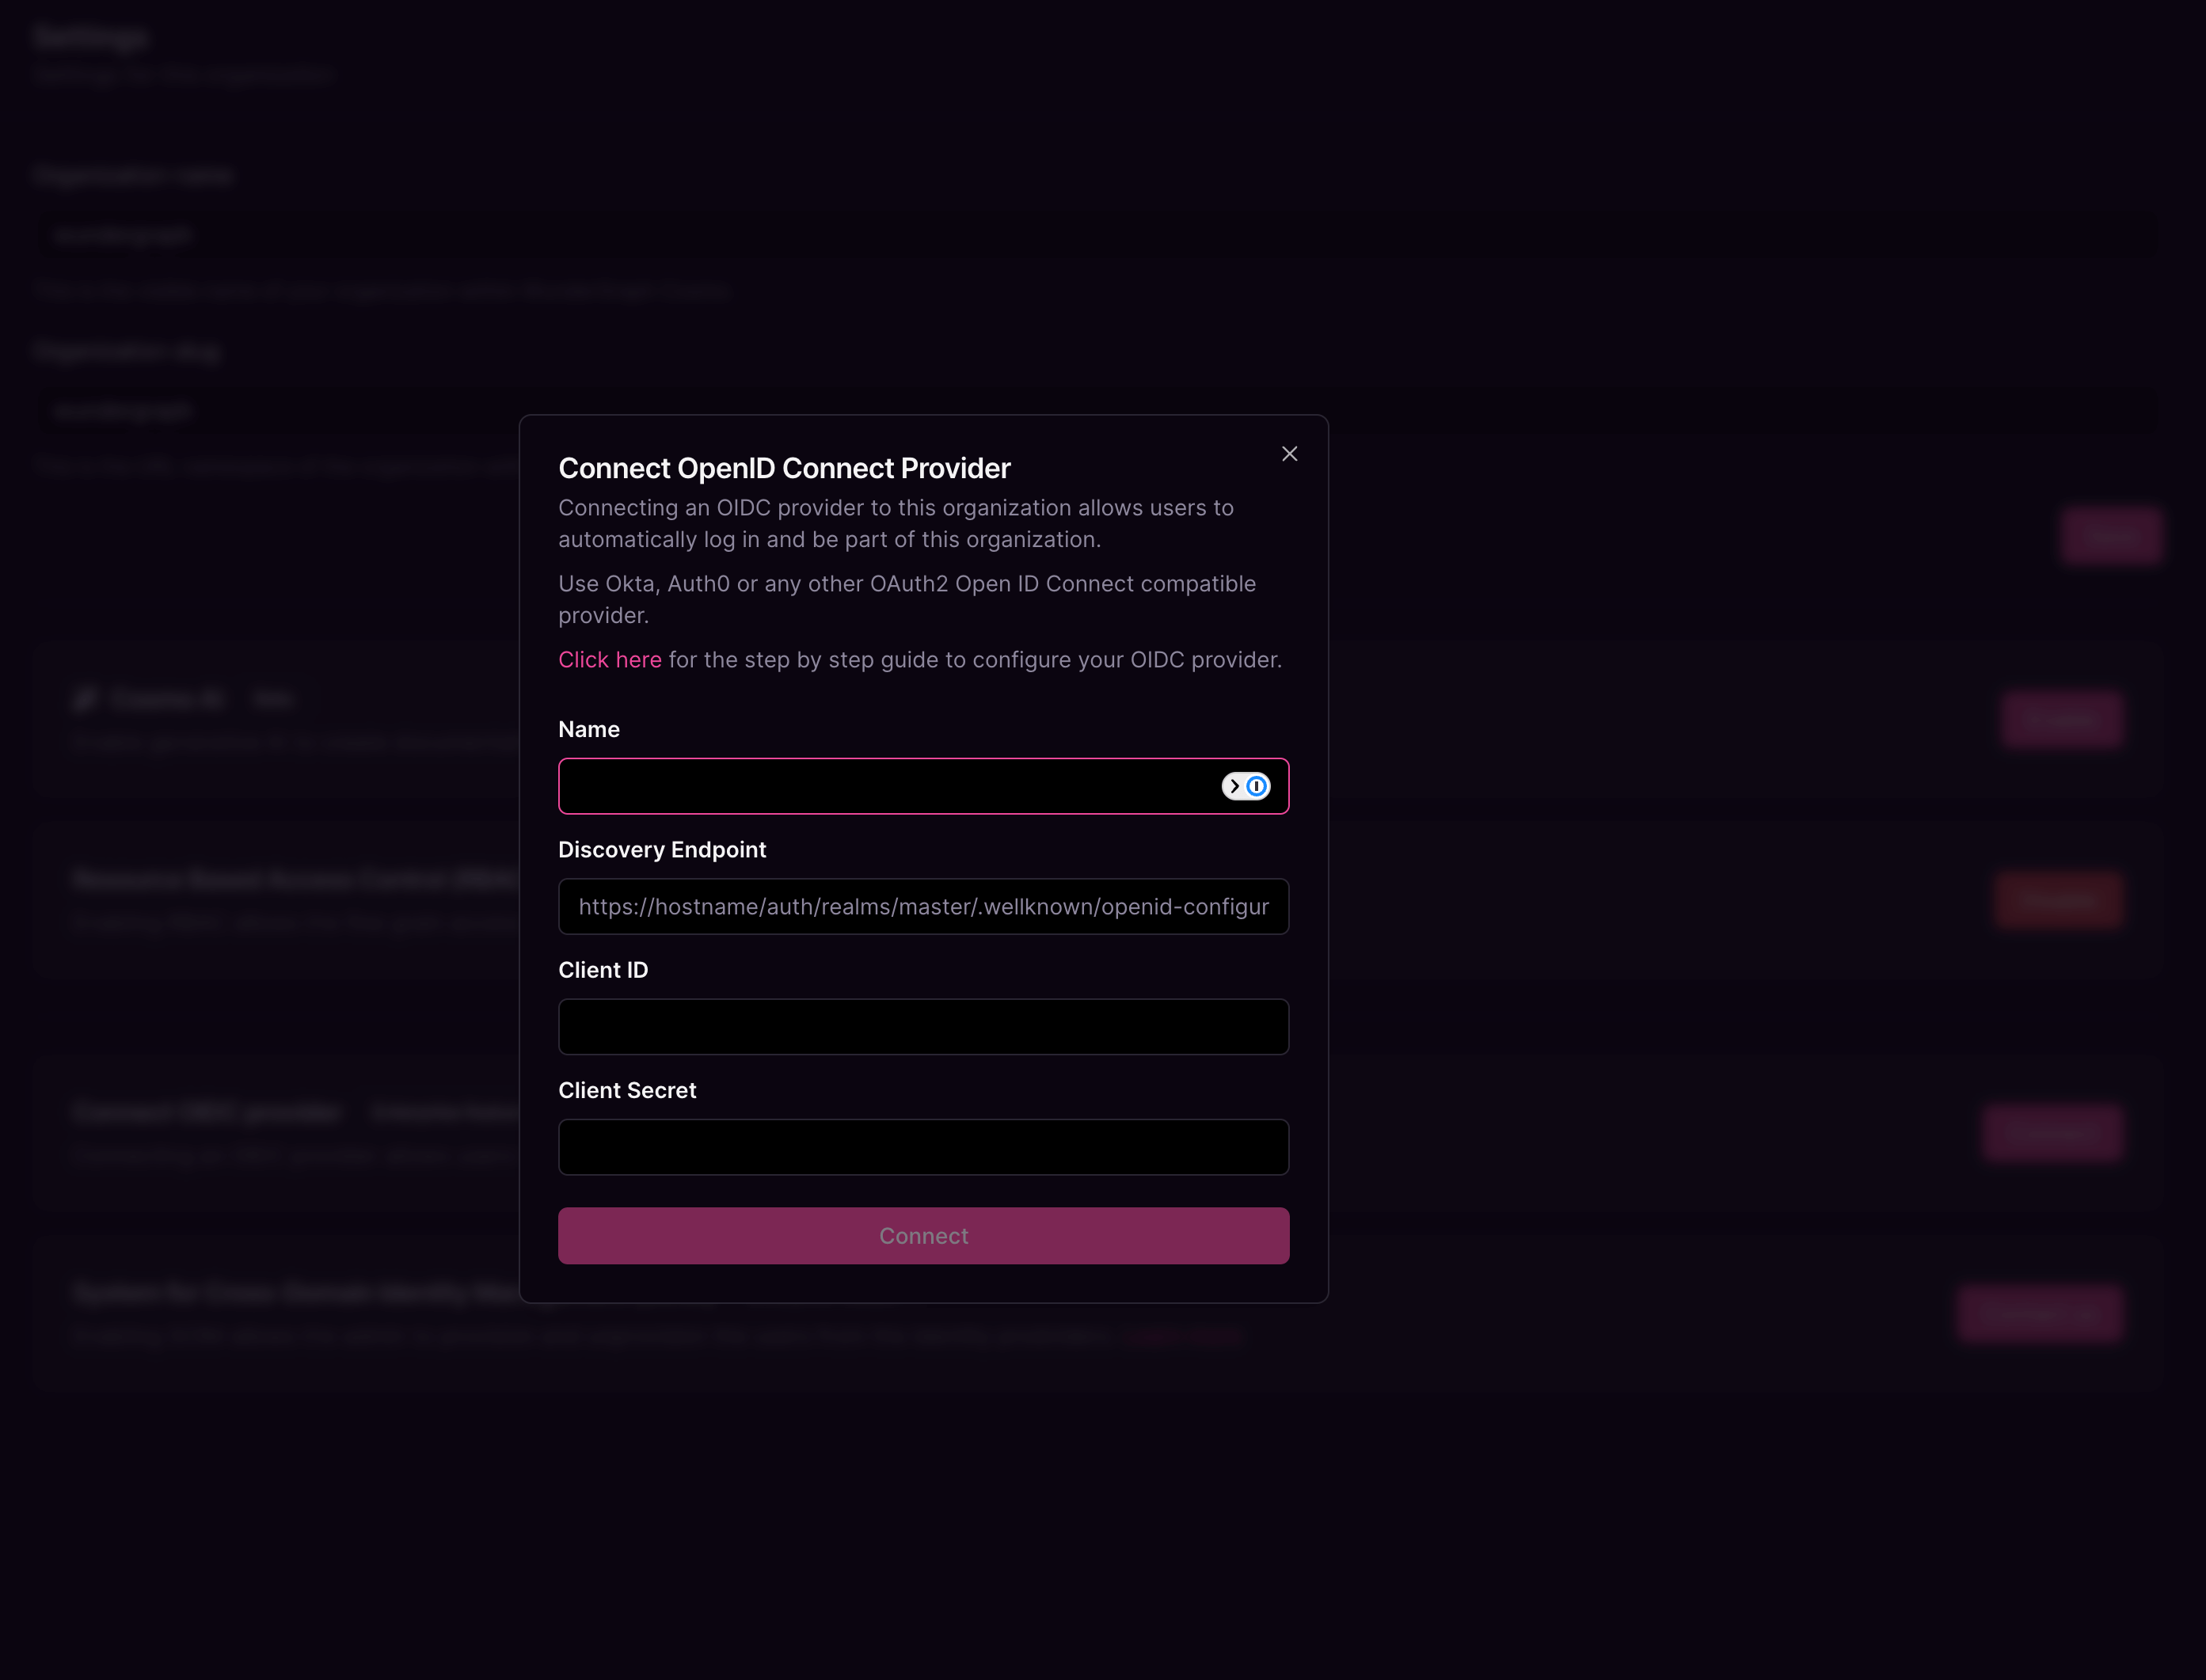
14
Configure the mapping between the roles in Cosmo and the user groups in Okta. The field Group in the provider can be populated with the name of the group or a regex to match the user groups. Once all the mappers are configured, click on Save.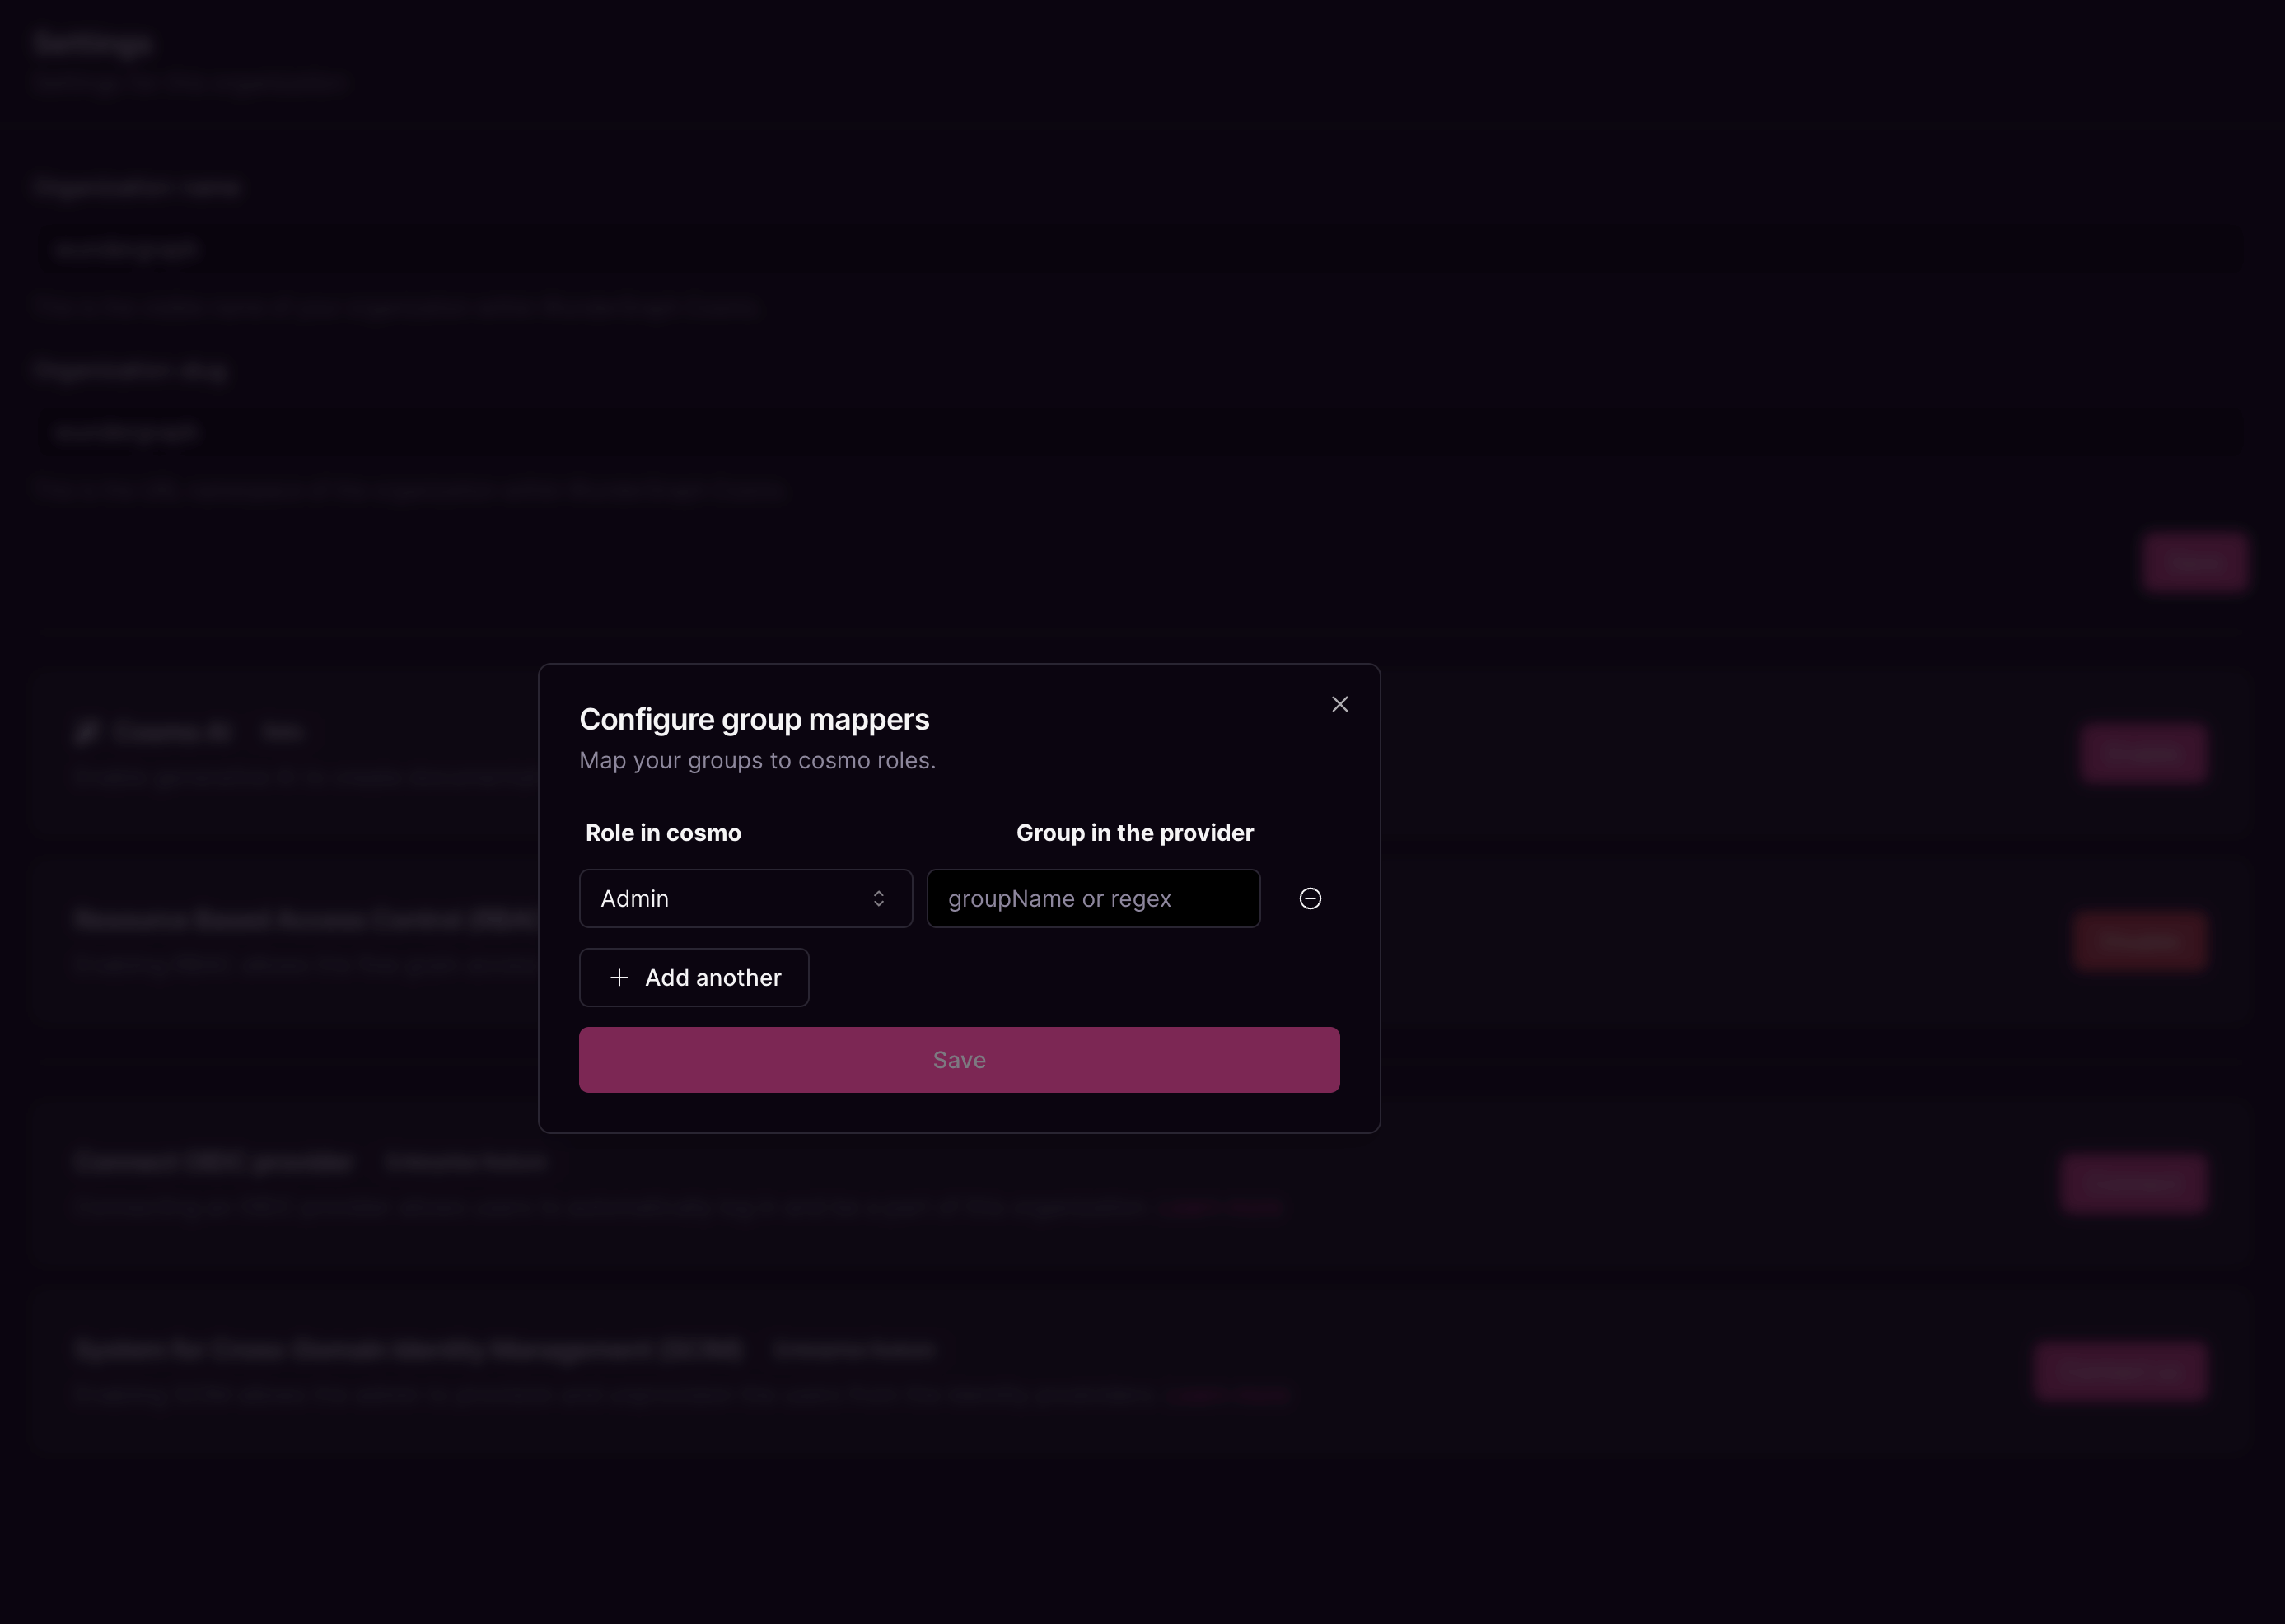
15
Copy the sign-in and sign-out redirect URIs displayed in the dialog.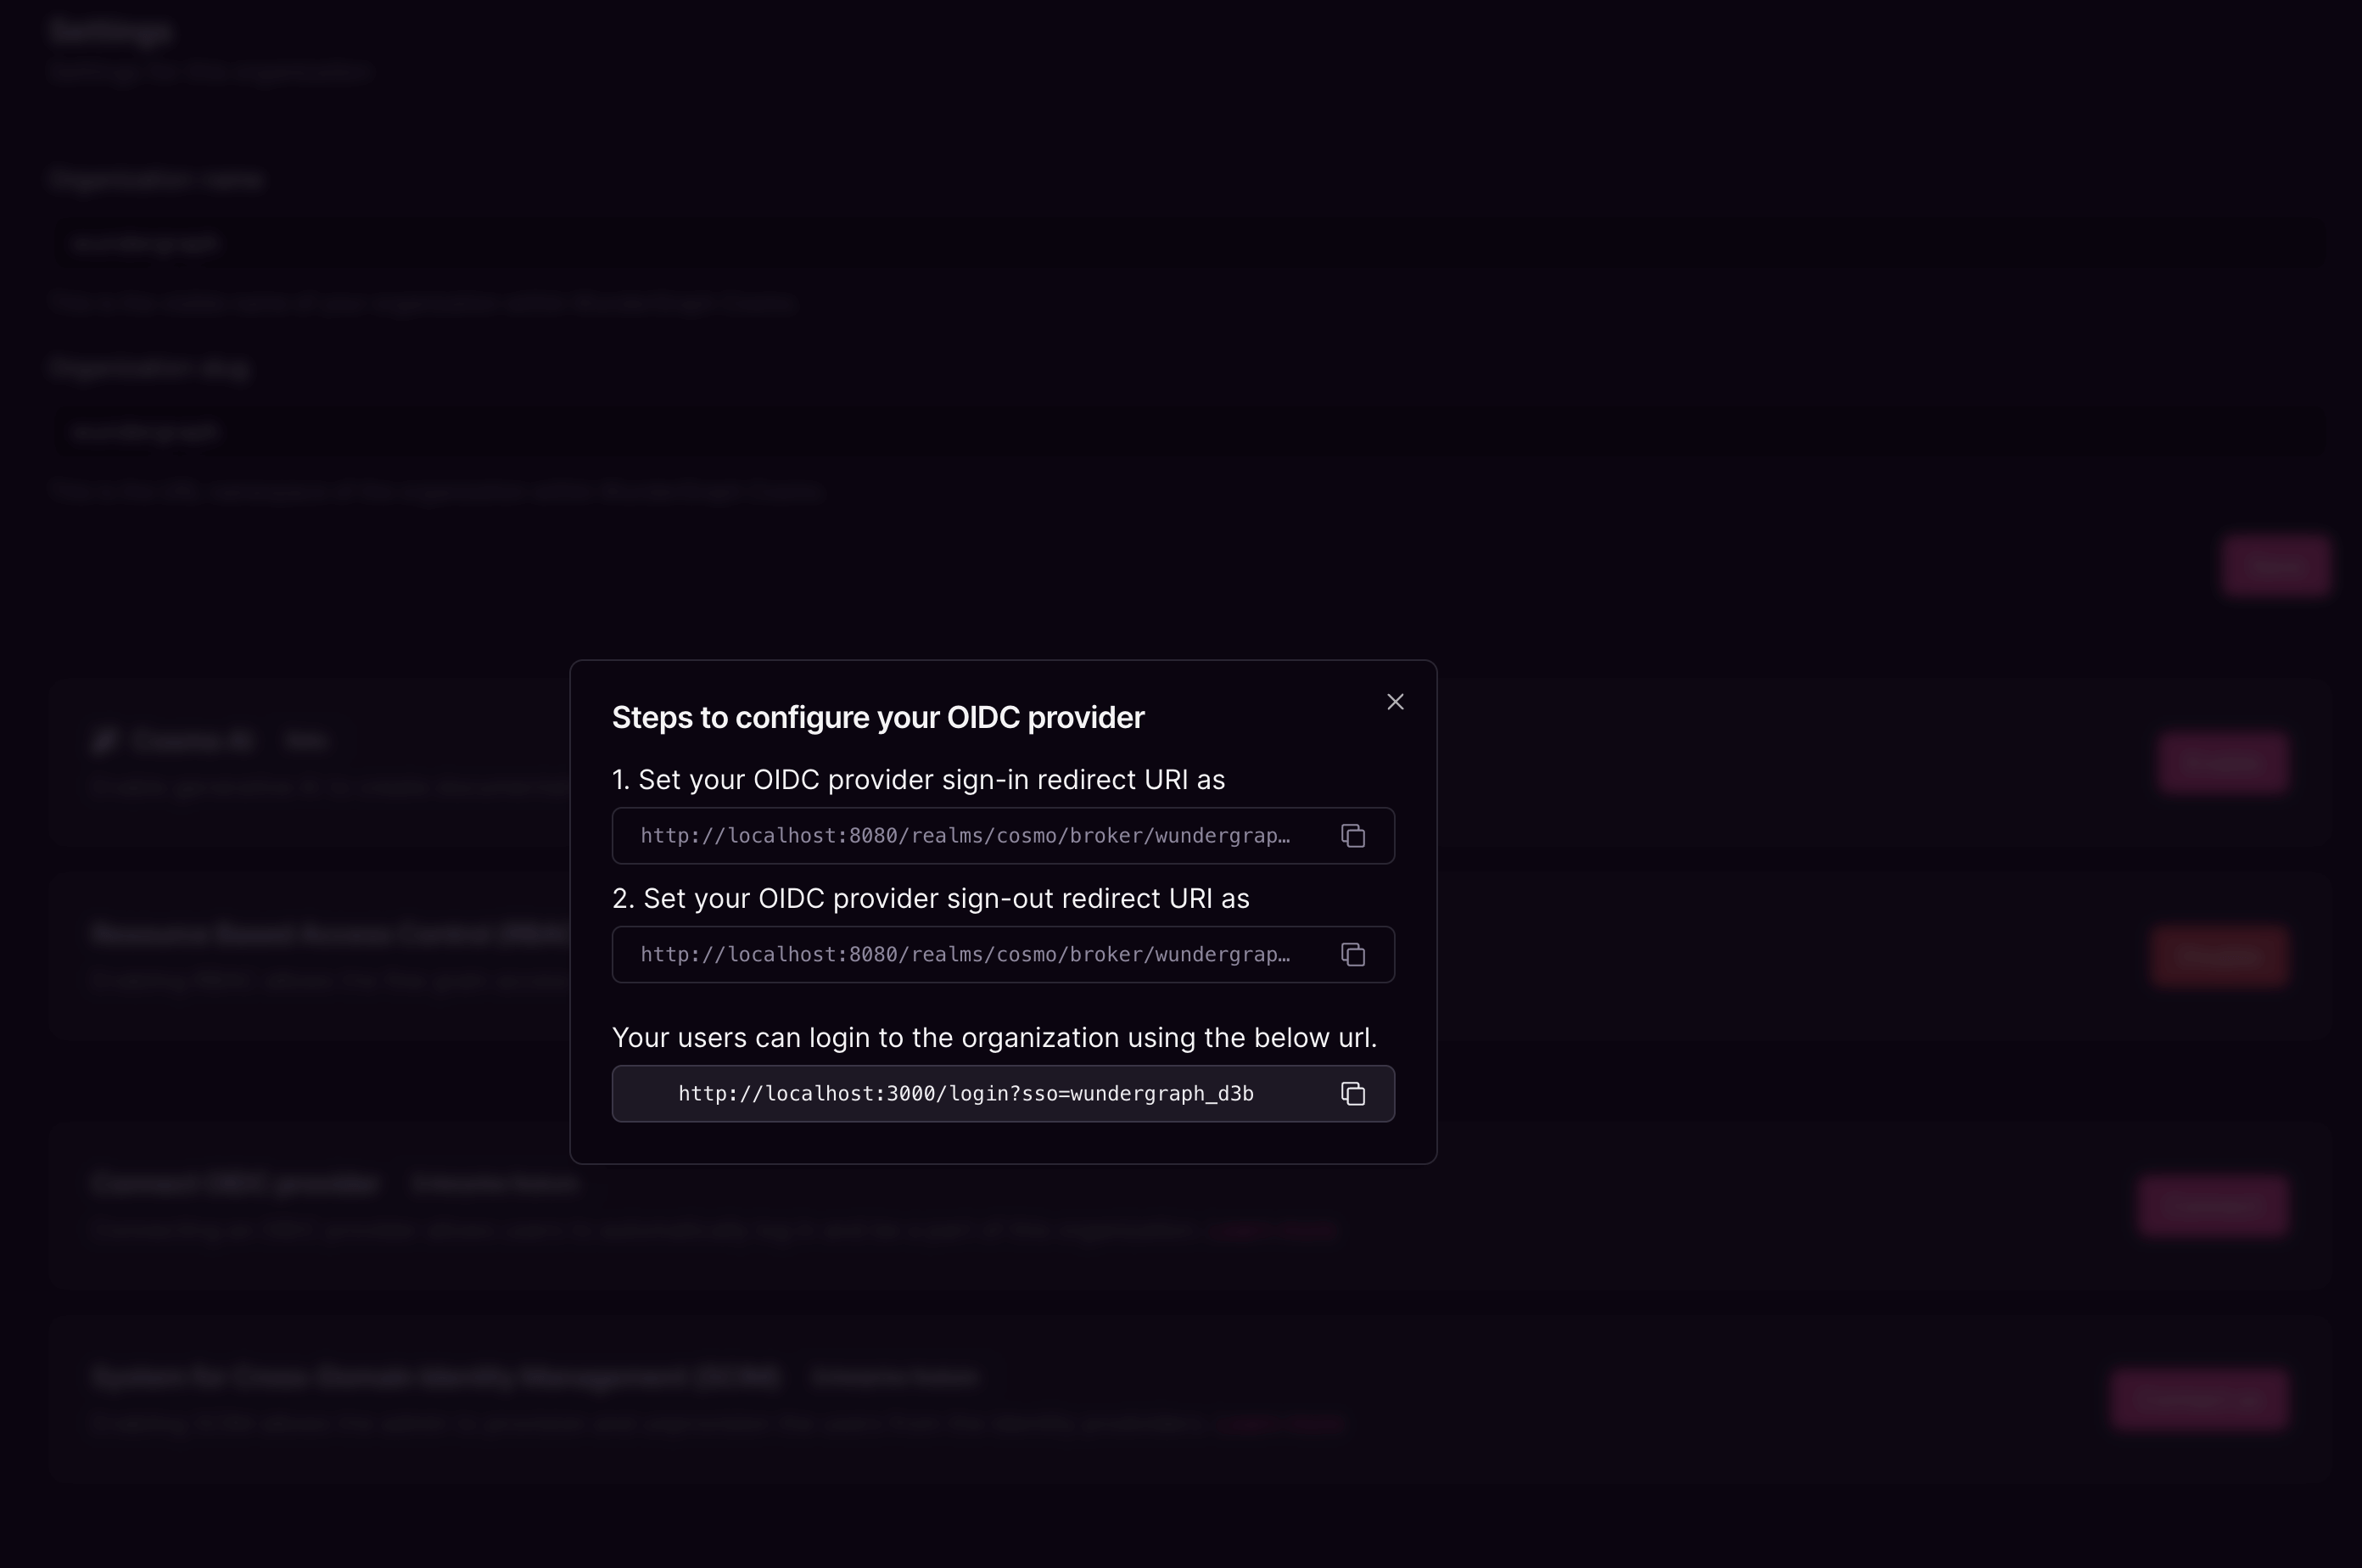
16
Navigate back to the application created on Okta and populate the Sign-in and Sign-out redirect URIs with the above-copied values. Click on Save.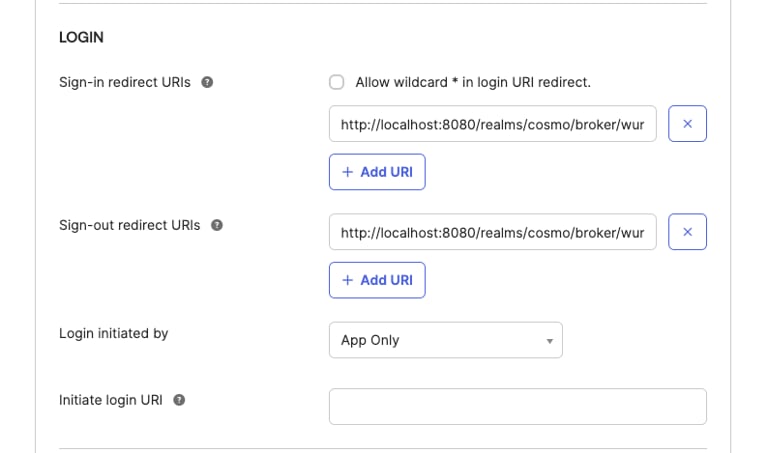
17
Depending on your Okta tenant’s available features, configure the
ssoGroups claim directly on your application, using either Authorization Servers or Token Claims.18
You may now assign users and groups to the application. Assigned users can sign in to Cosmo with the provider URL.
Users assigned to the application must have a username.
Using Authorization Servers
1
Navigate to Security → API, then click the Default authorization server. Open the Claims tab, then click Add Claim.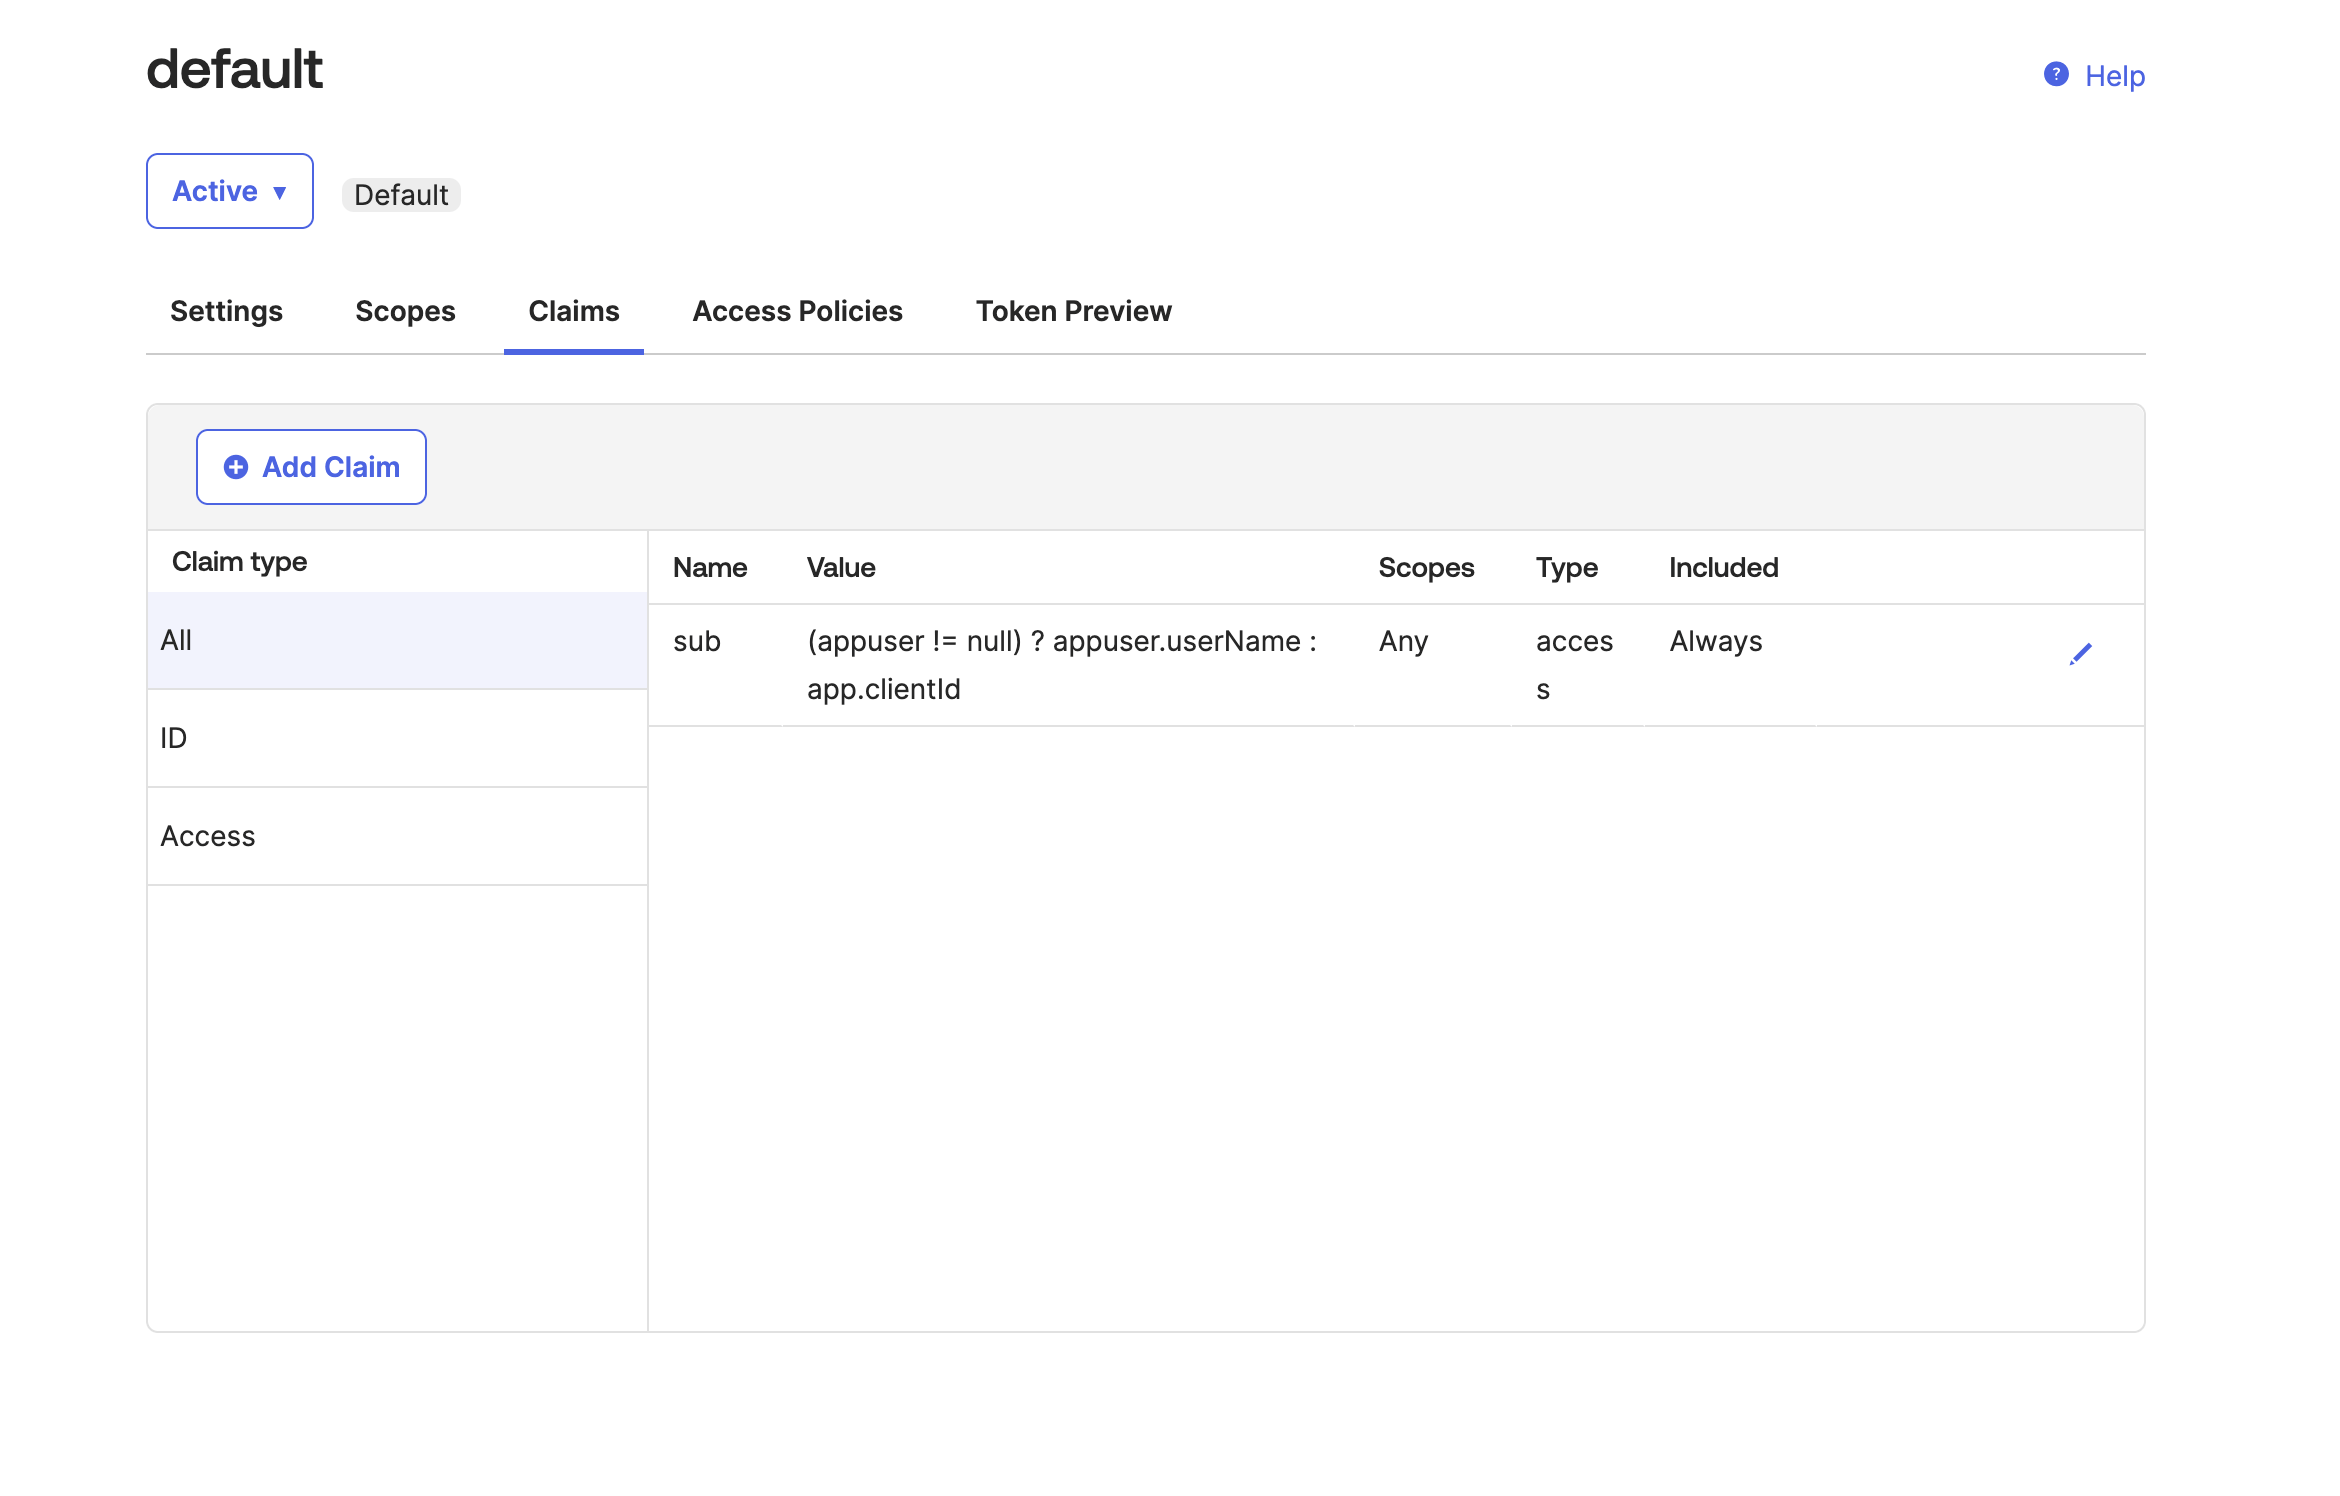
1
Name the claim 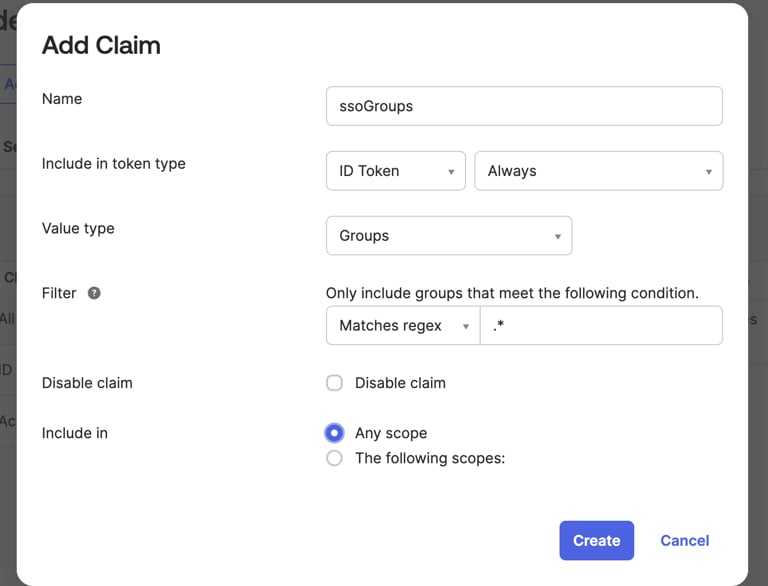
ssoGroups and include it in the ID Token. For value type, select Groups. For filter, select Matches regex and enter .* in the field. Click Create.Using Token Claims
1
Navigate to Applications and Resources → Applications, then select the application.
1
Select the 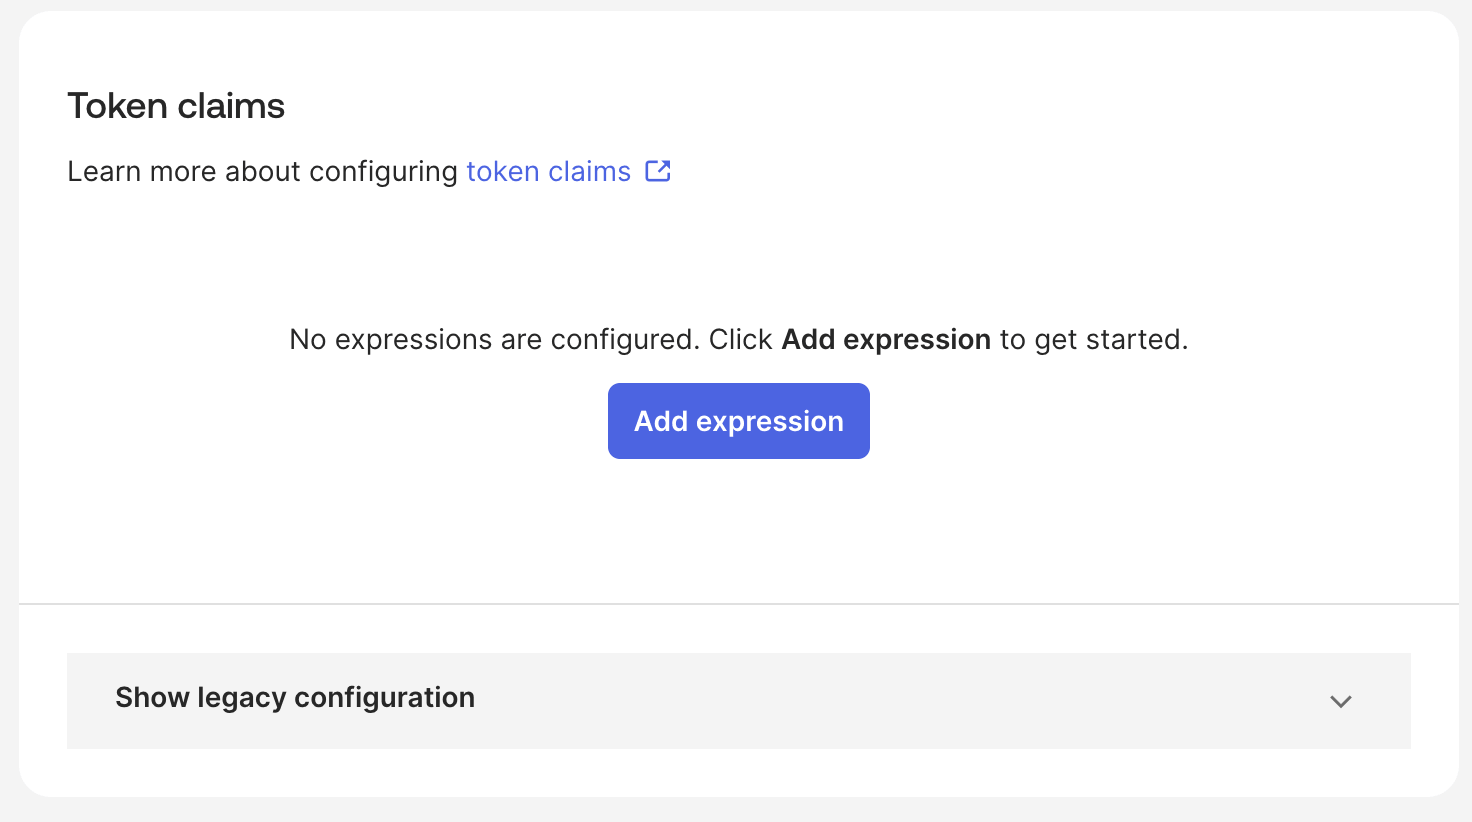
Sign On tab, scroll to the Token Claims card, then click Add Expression.1
Name the expression 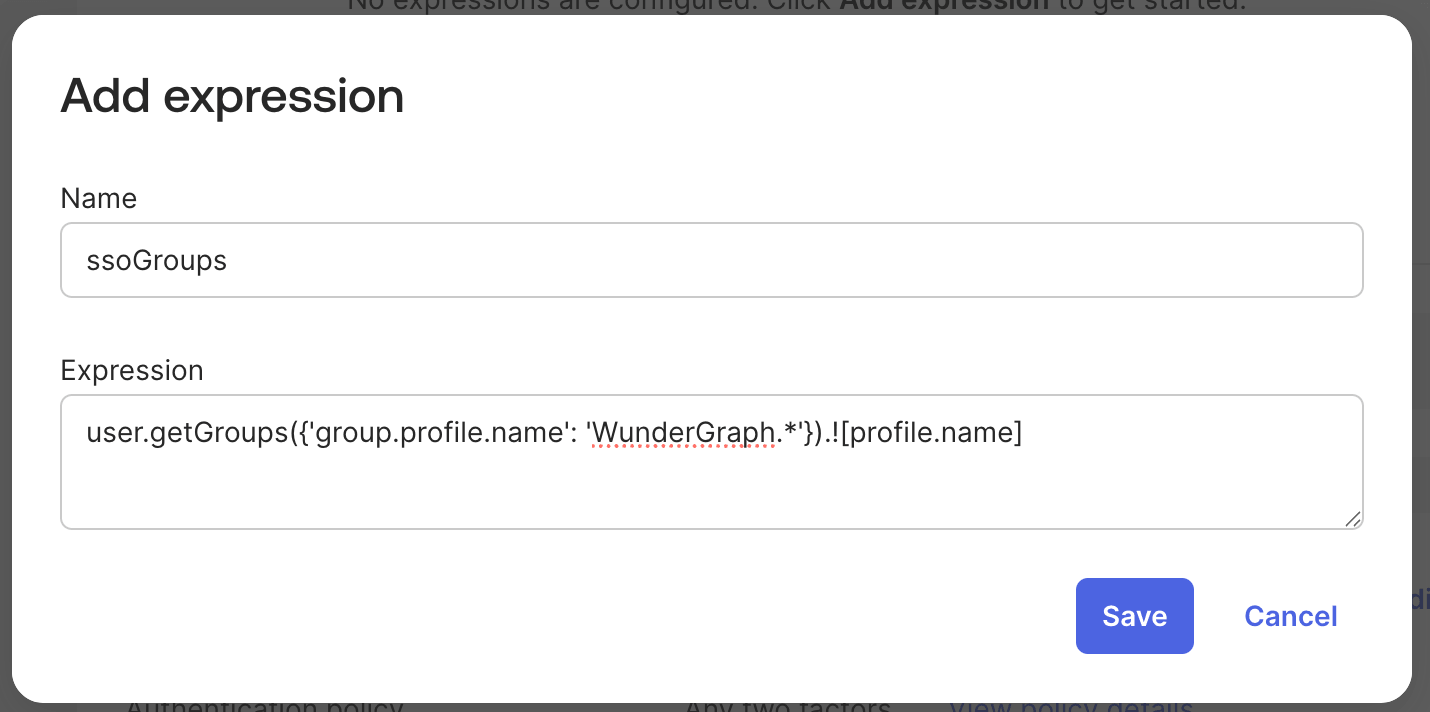
ssoGroups. For the expression, enter user.getGroups({'group.profile.name': 'WunderGraph.*'}).![profile.name], then click Save.This expression tells Okta to assign all groups that start with WunderGraph to the ssoGroups claim. You can adjust the expression to fit your organization’s needs. To learn more,
refer to the Okta documentation.